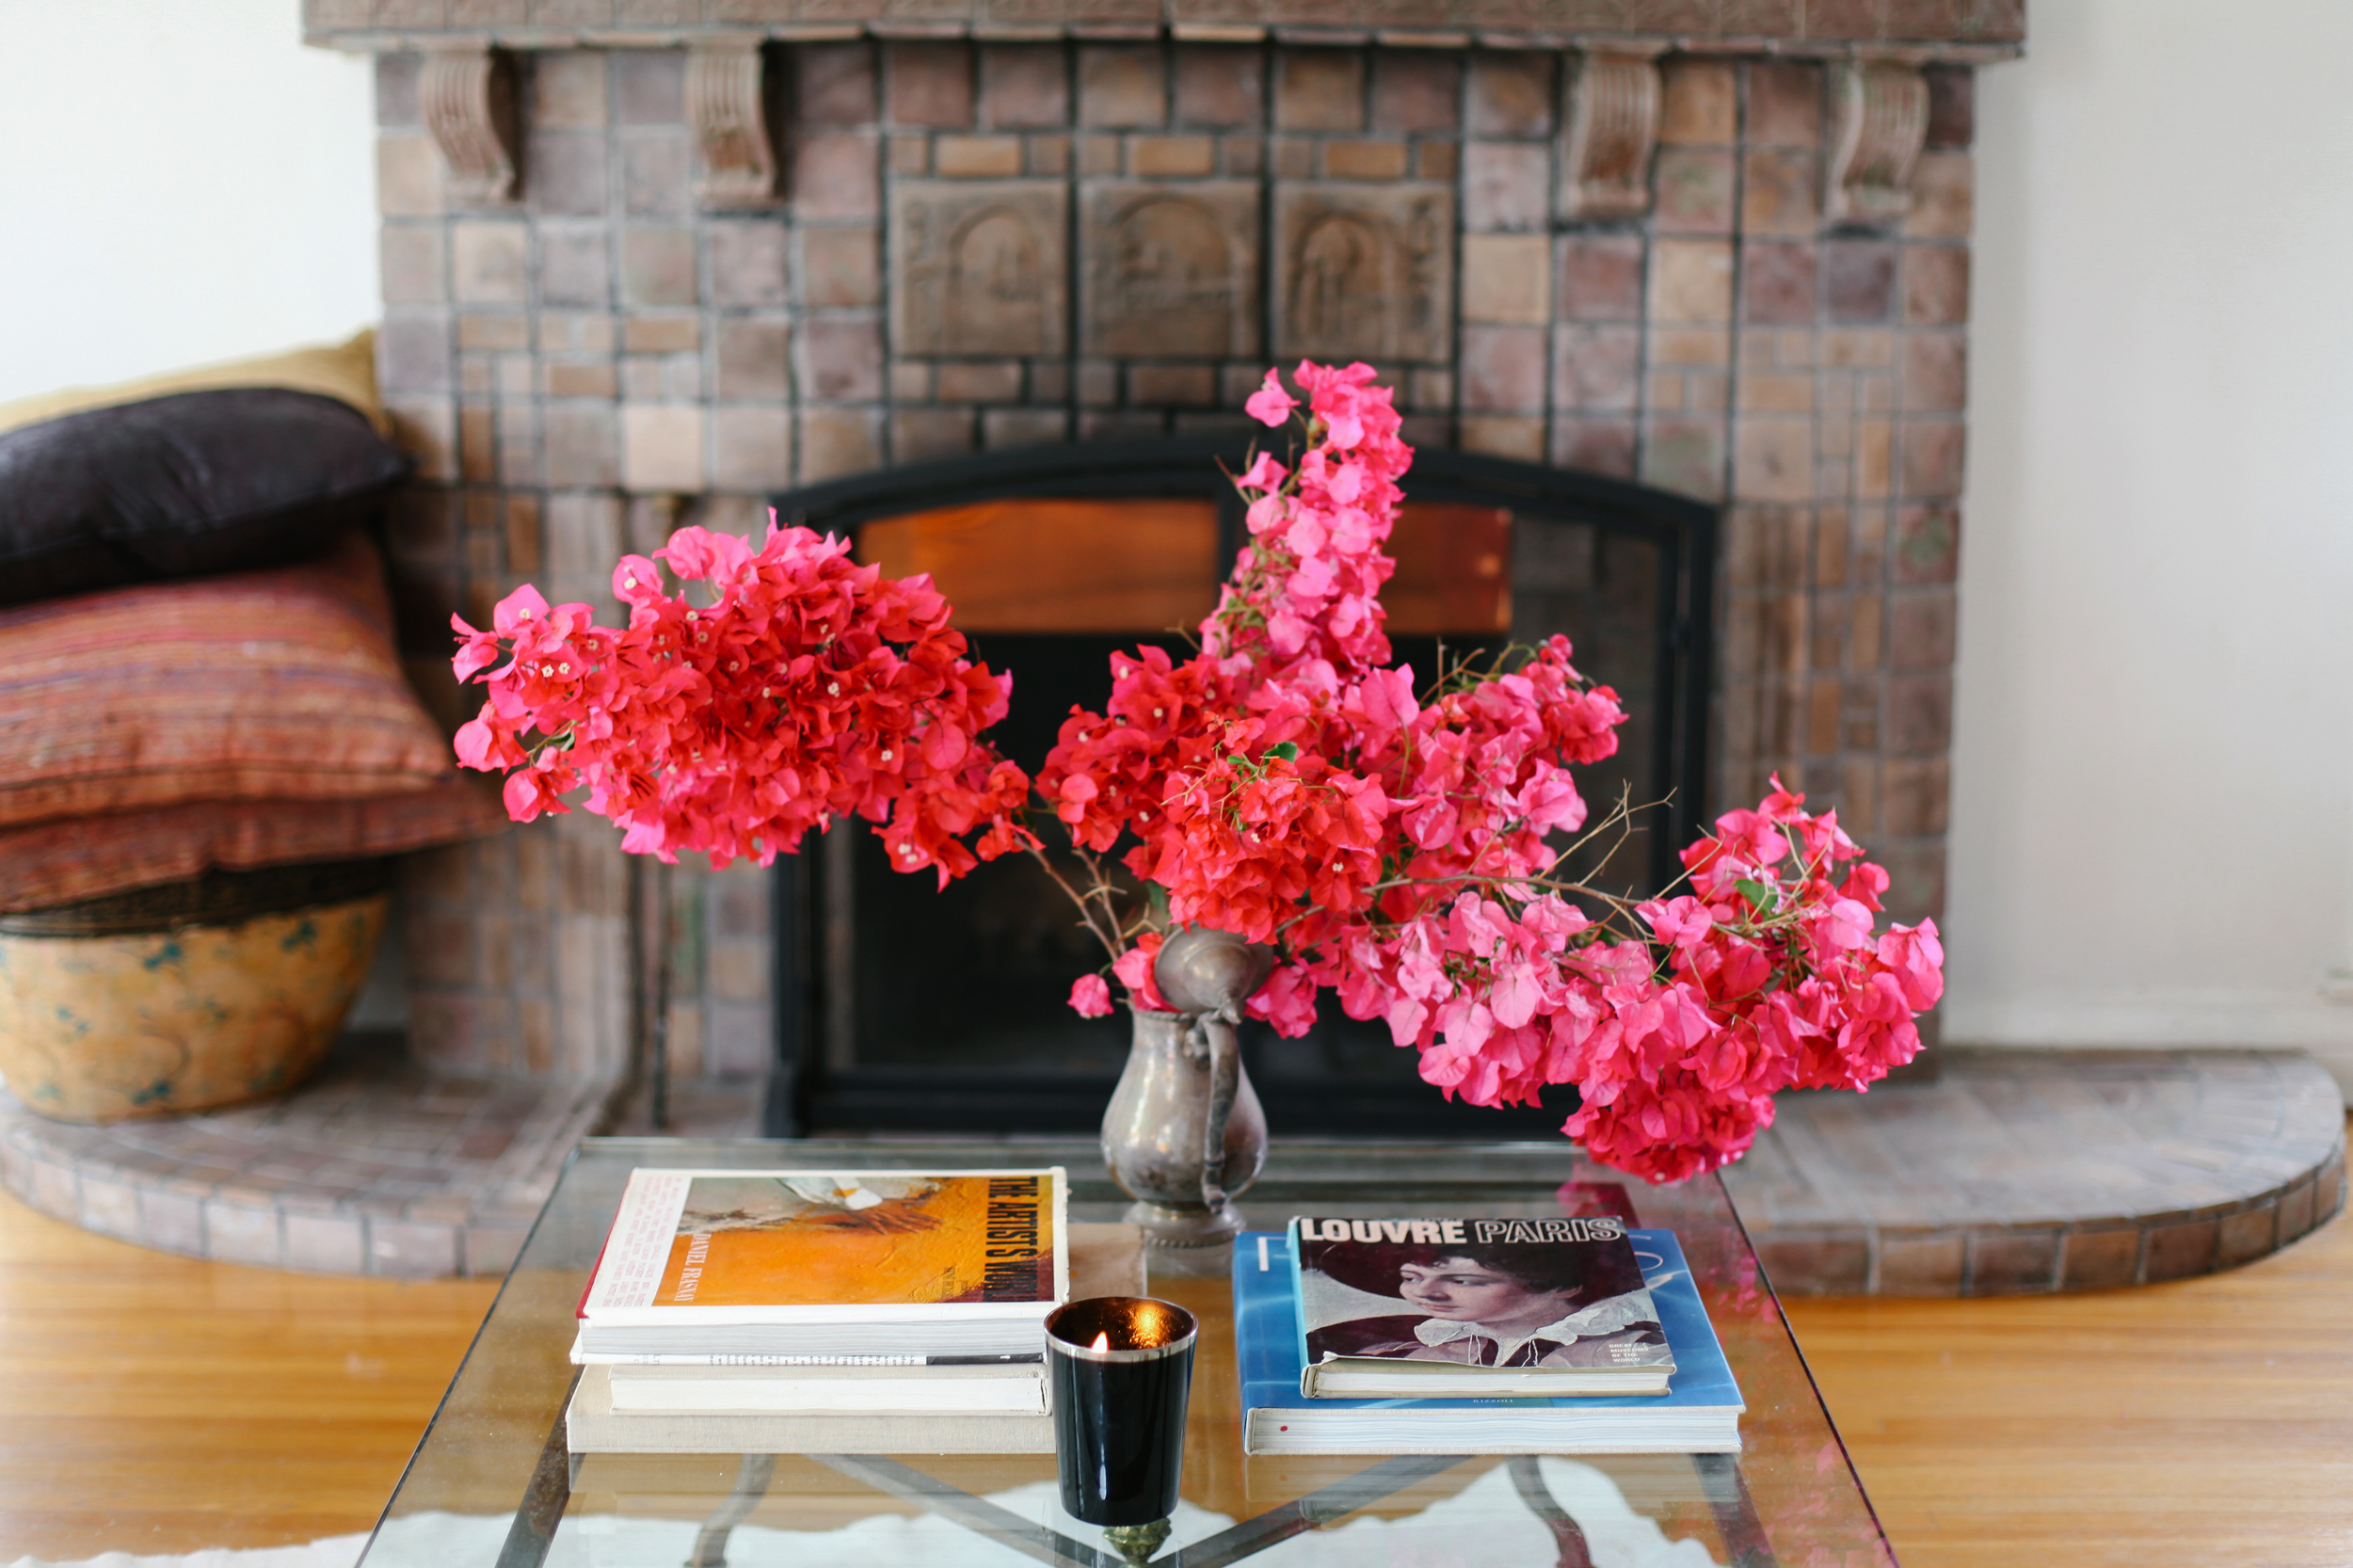
Red bougainvilleas are beautiful off and on the branch. They create more interesting shapes than roses or tulips.
The views expressed on this weblog are mine alone and do not necessarily reflect the views of my employer, Perficient.
Red bougainvilleas are beautiful off and on the branch. They create more interesting shapes than roses or tulips.
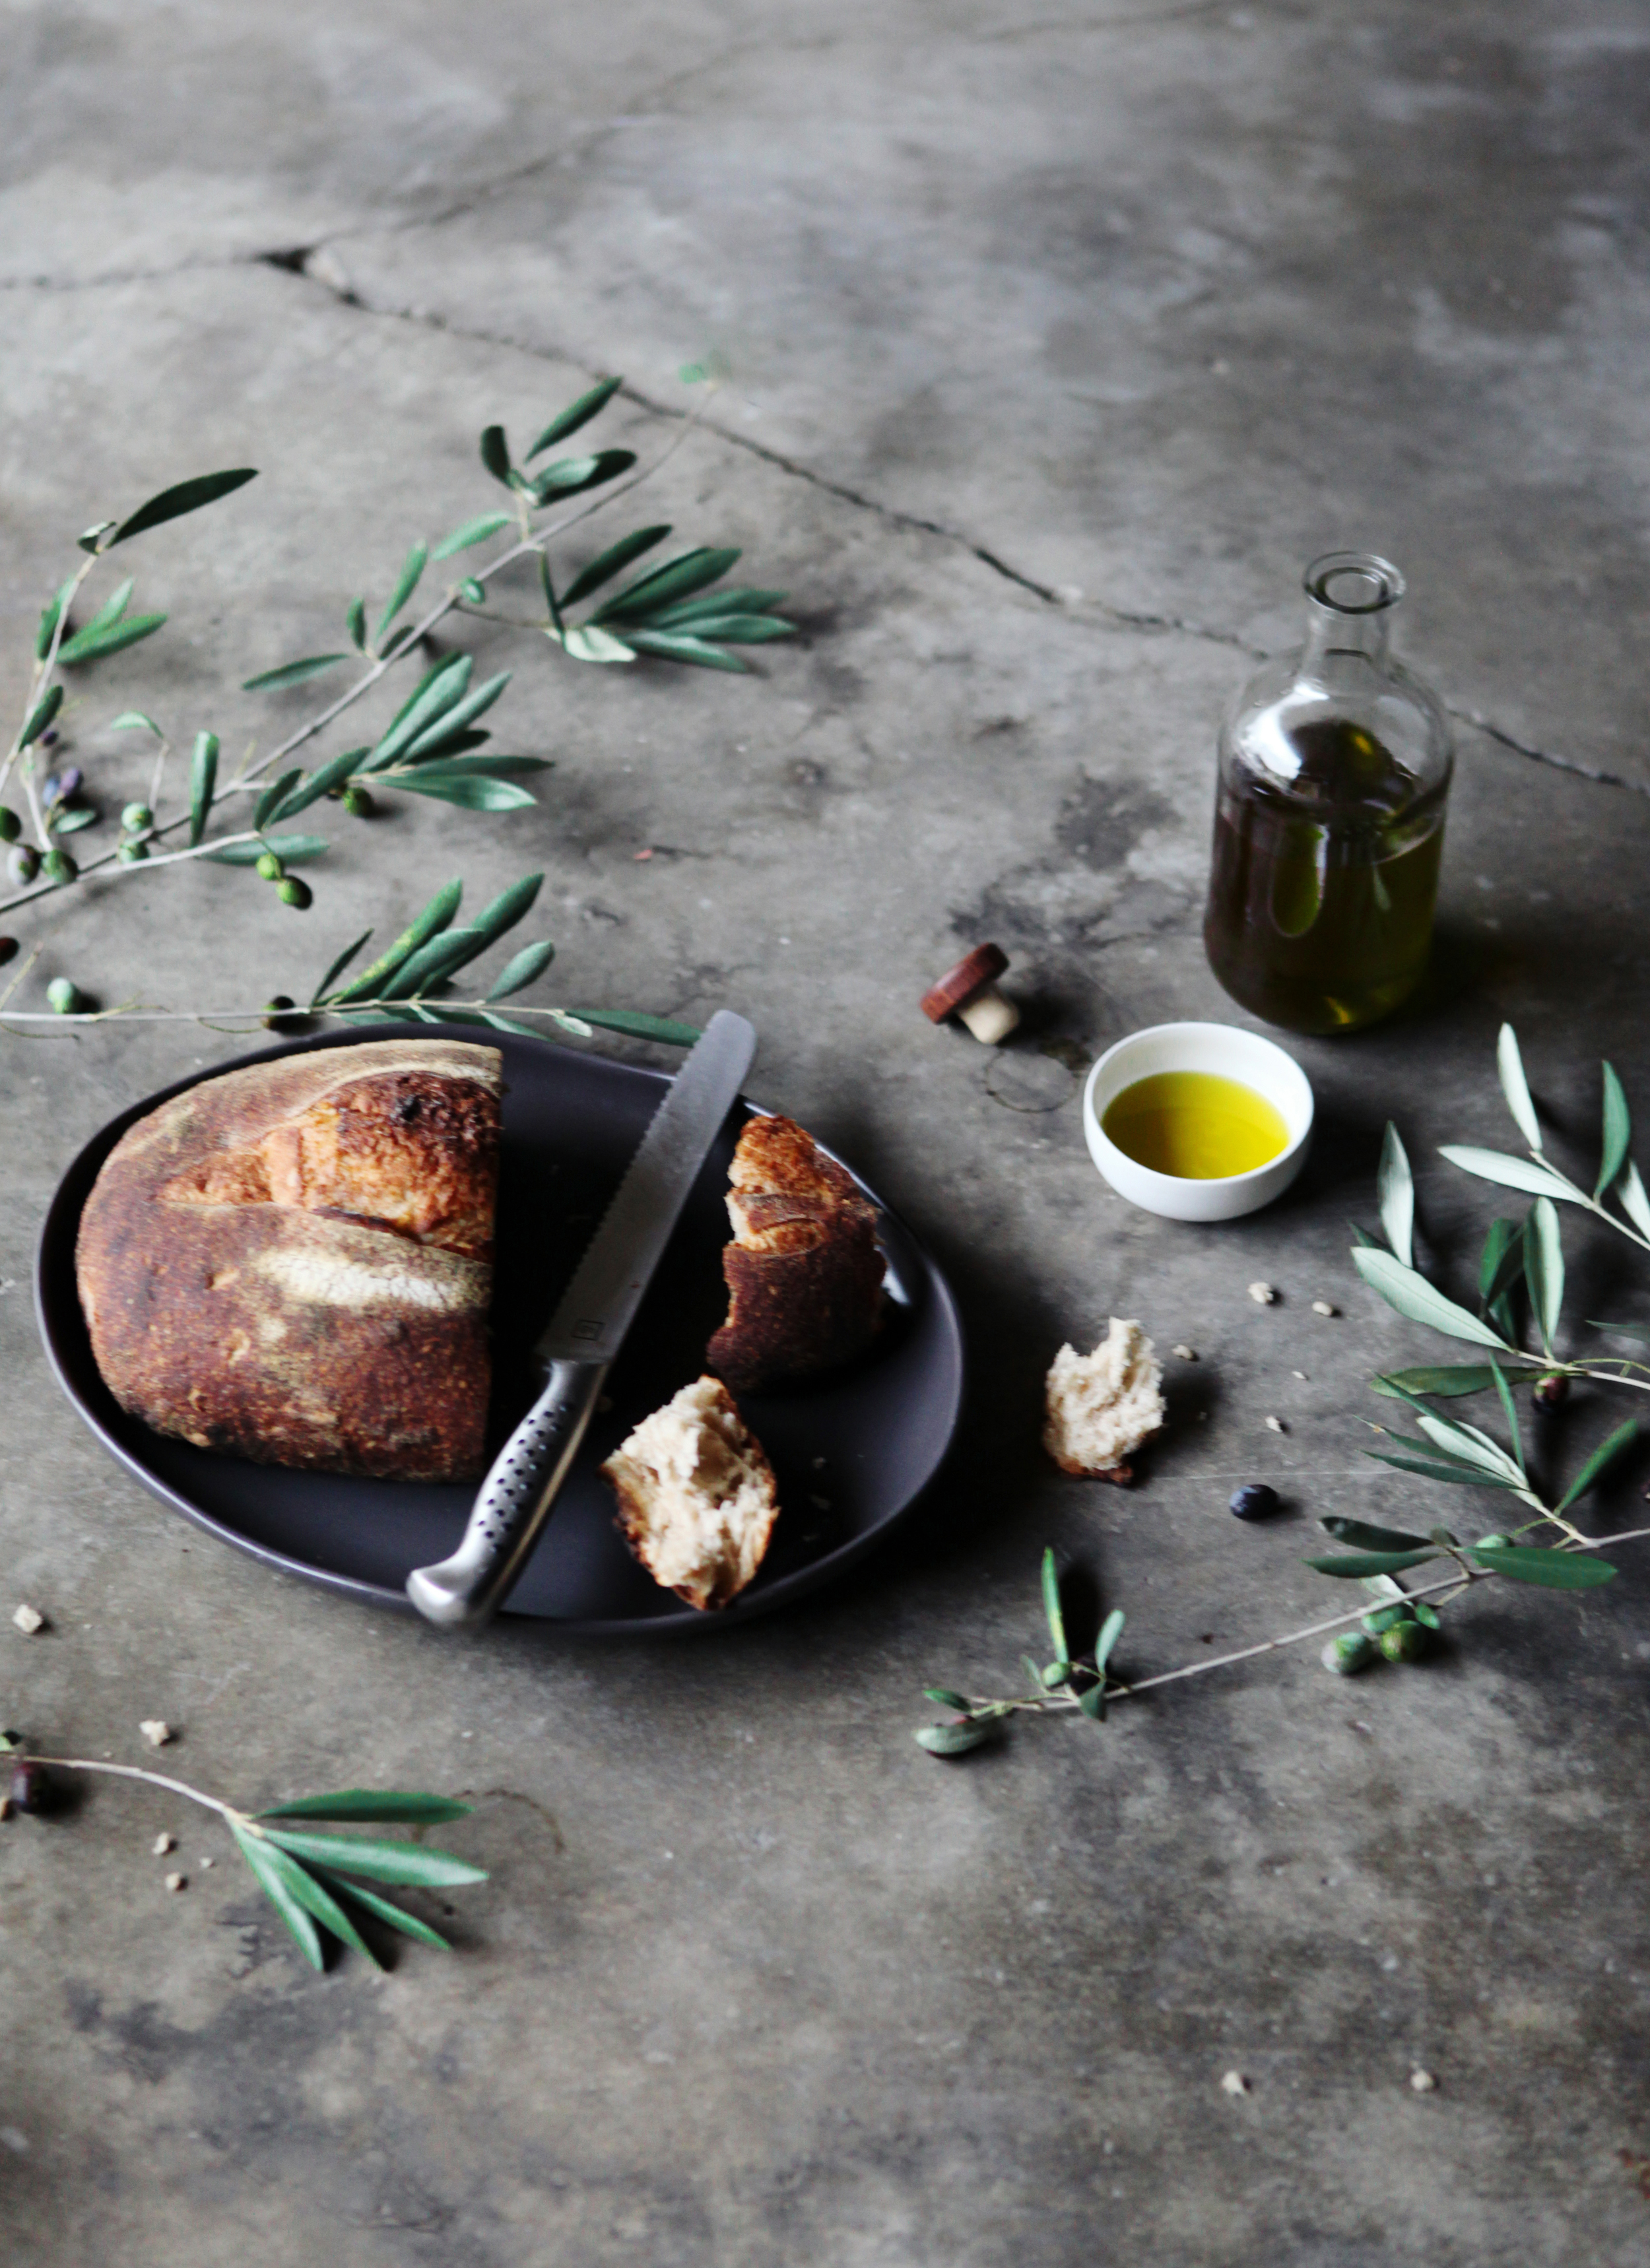
Nothing beats the slight tang and softness of a ciabatta. Here’s my recipe. Simply dip in some olive oil and balsamic vinegar.
When it comes to choosing decorative pieces, you want to stick to a maximum of three colors. Then it’s all about placement.
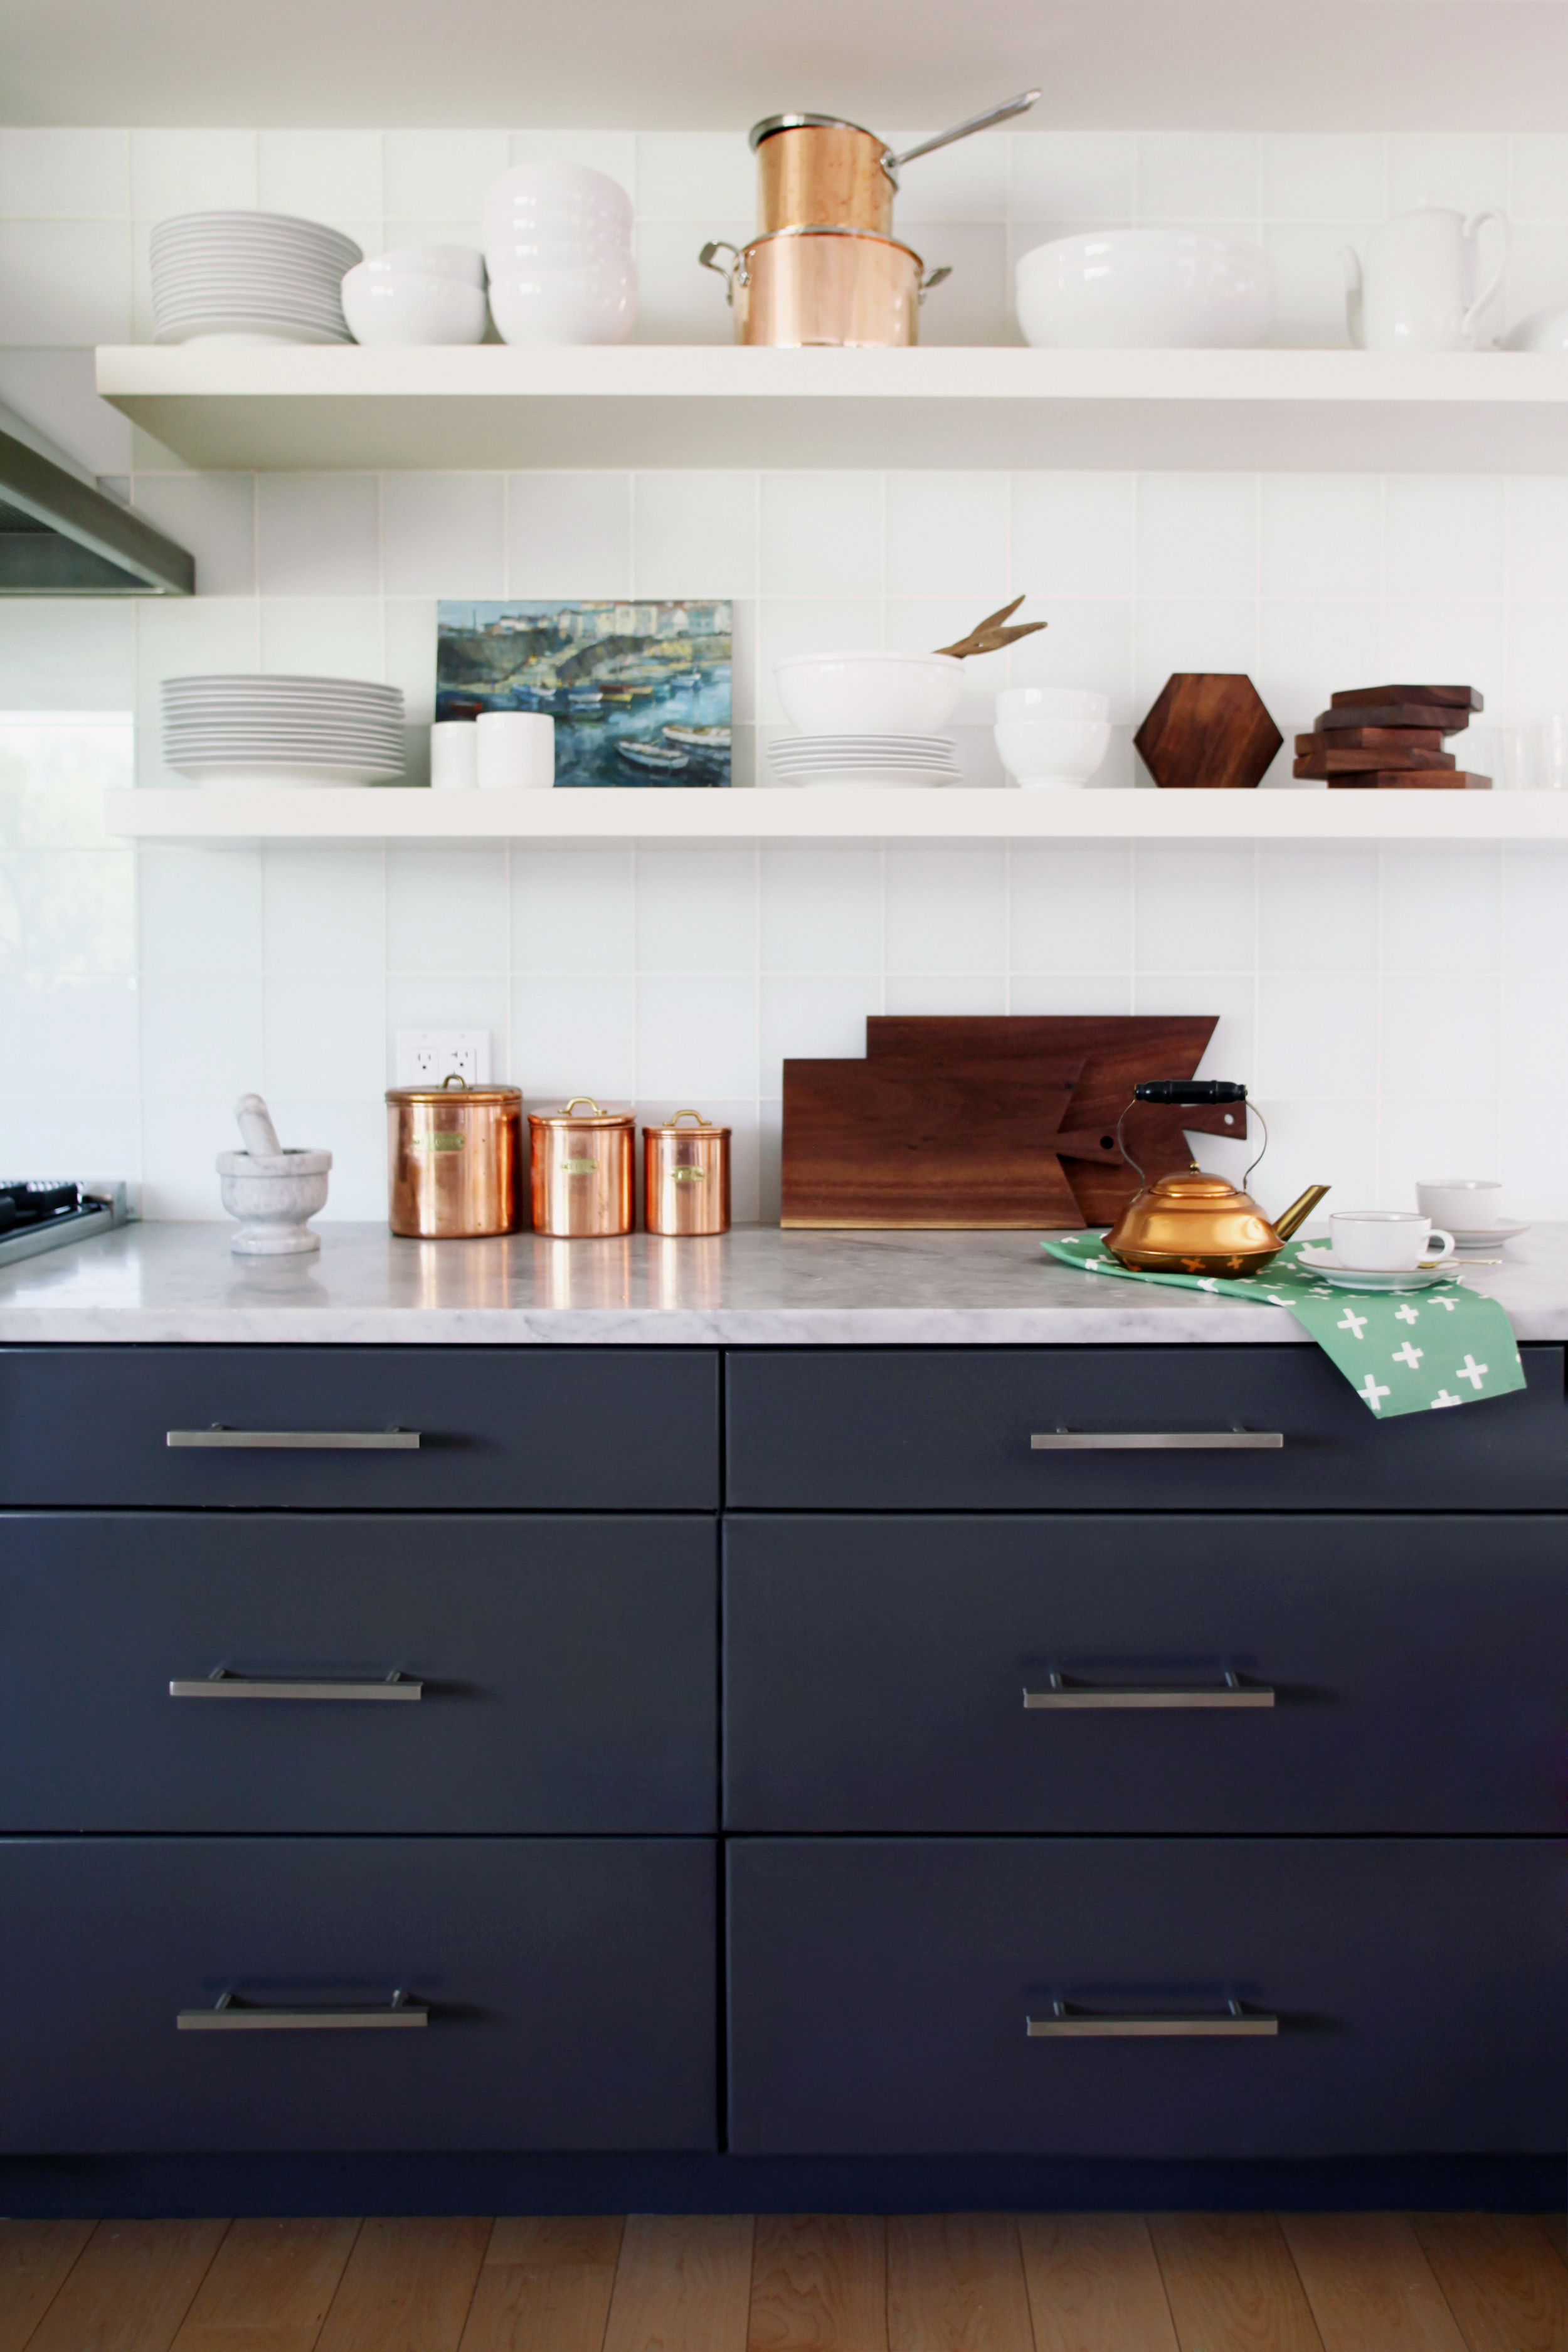
If you have beautiful dishware and cookware, show them off with minimalist shelving. They’ll also be easier to access!
Discover how to make the most of your loft space by creating a second floor that doesn’t make you feel like a giant.
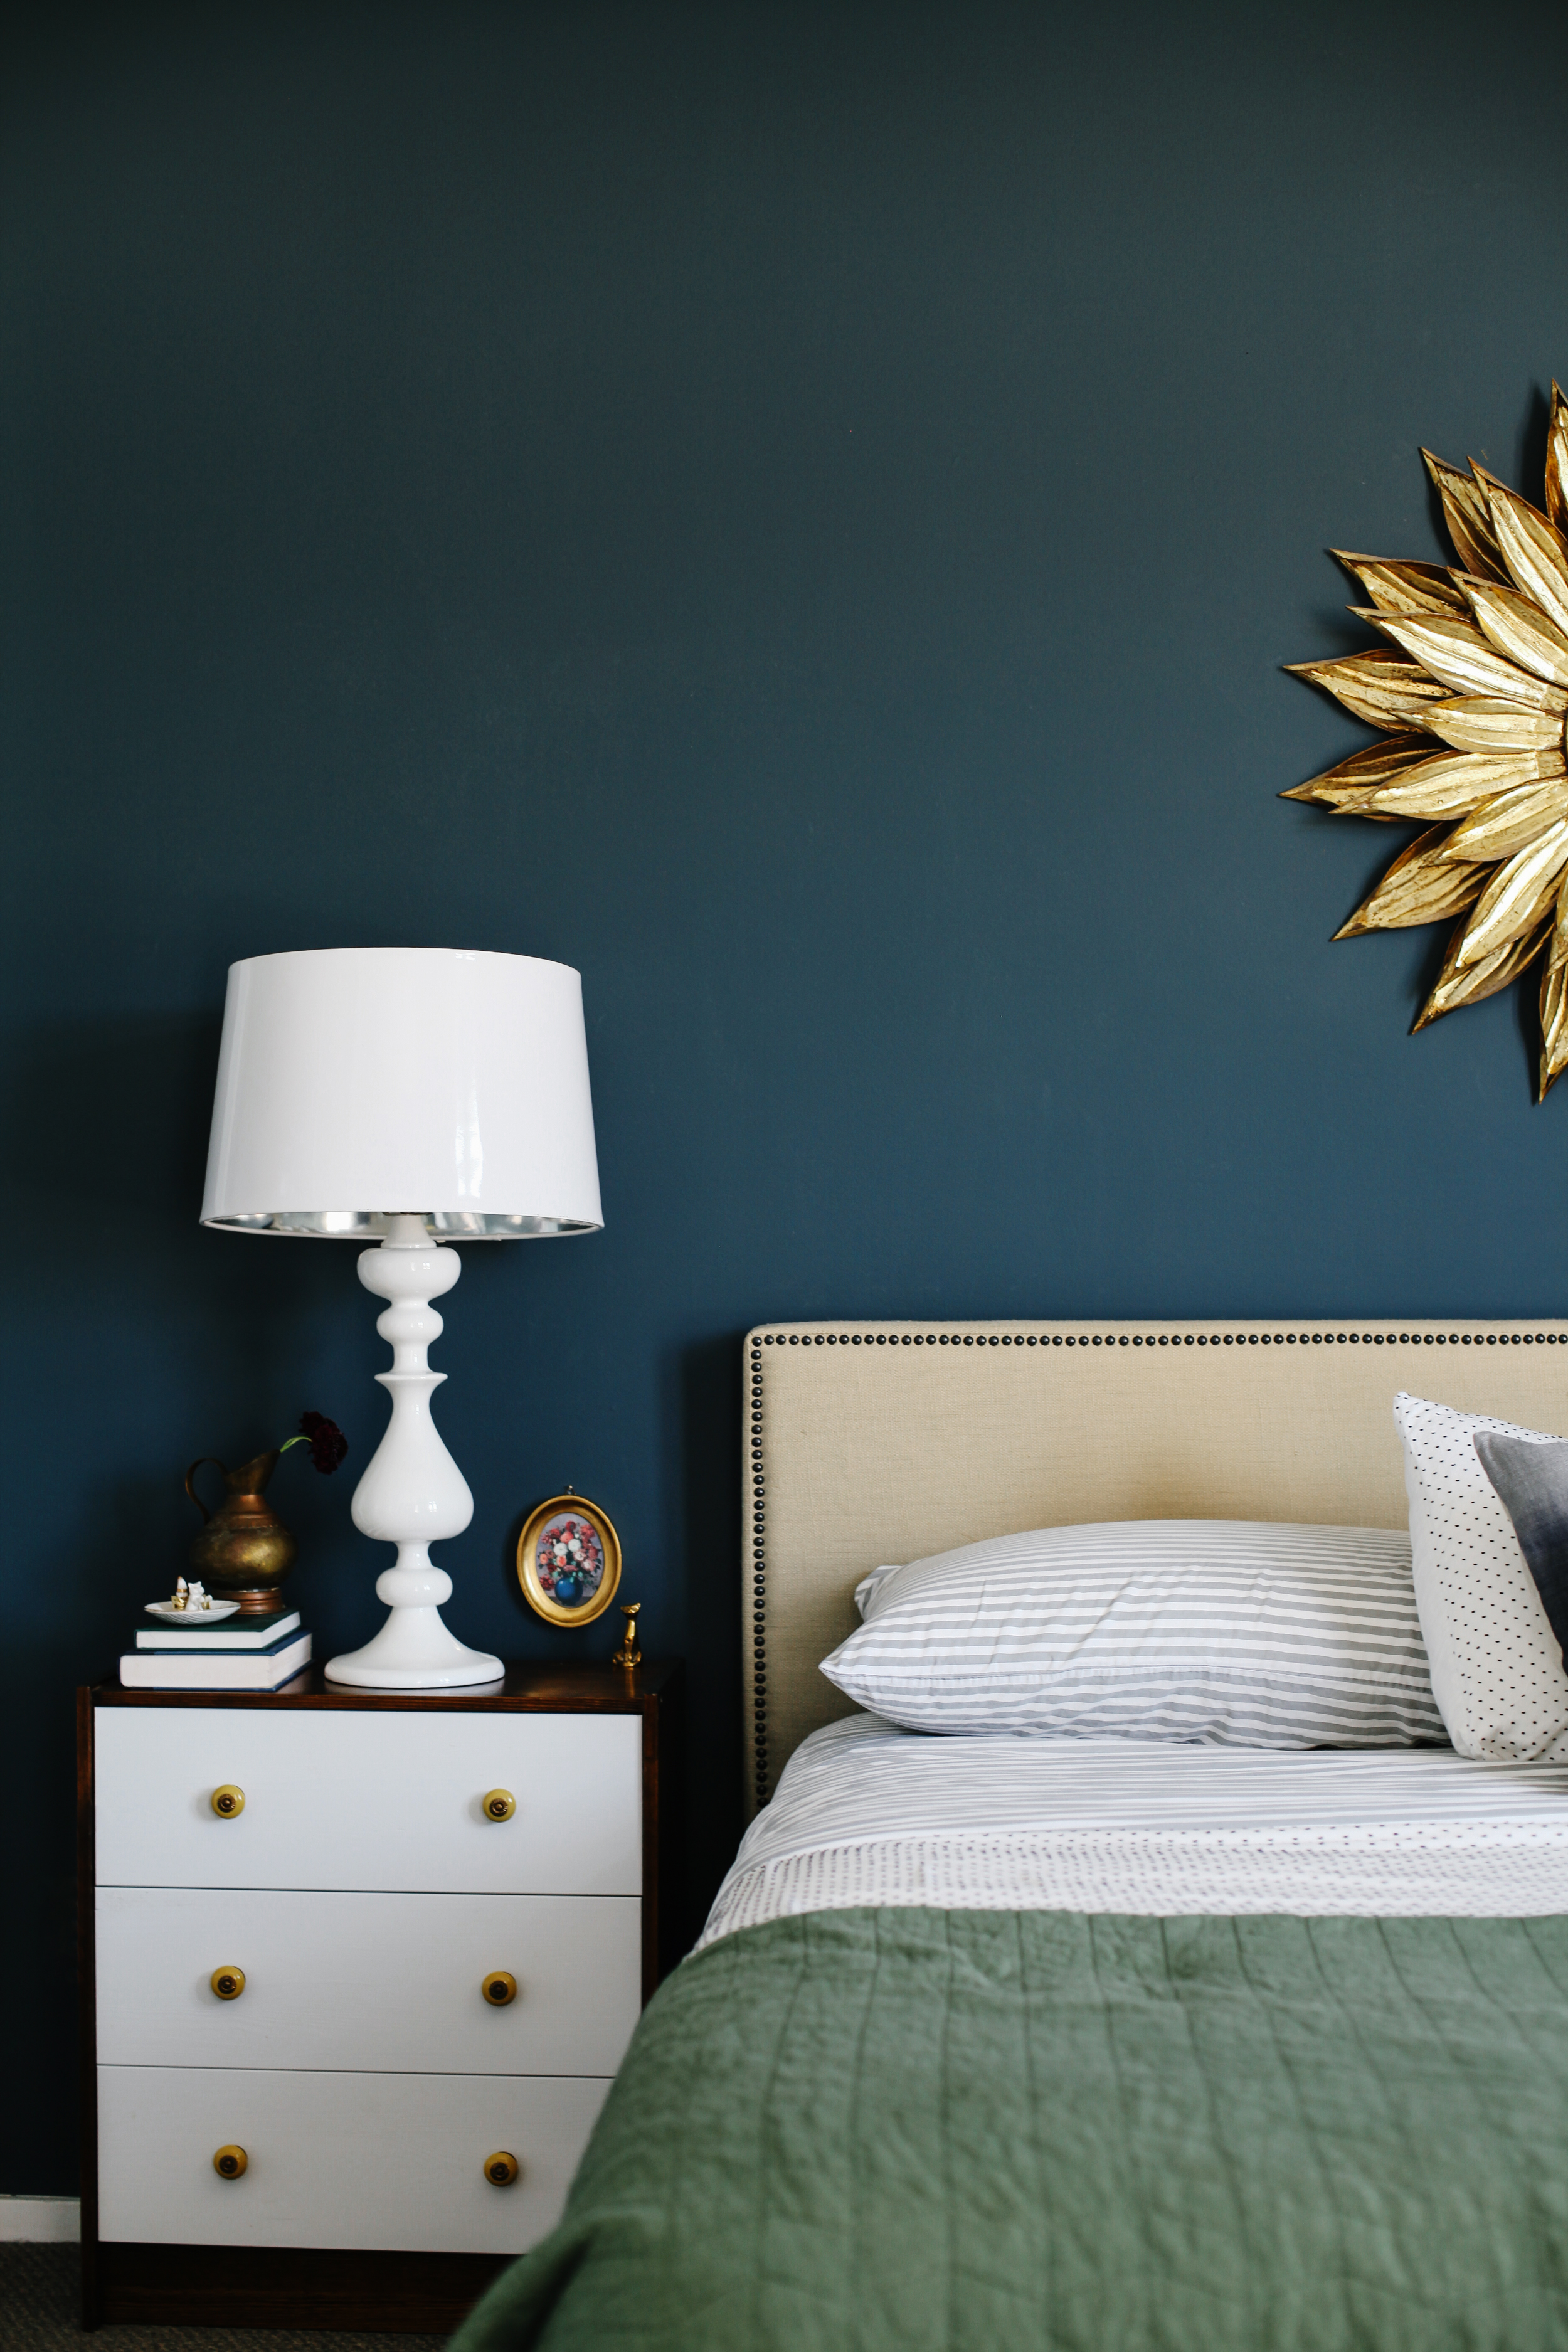
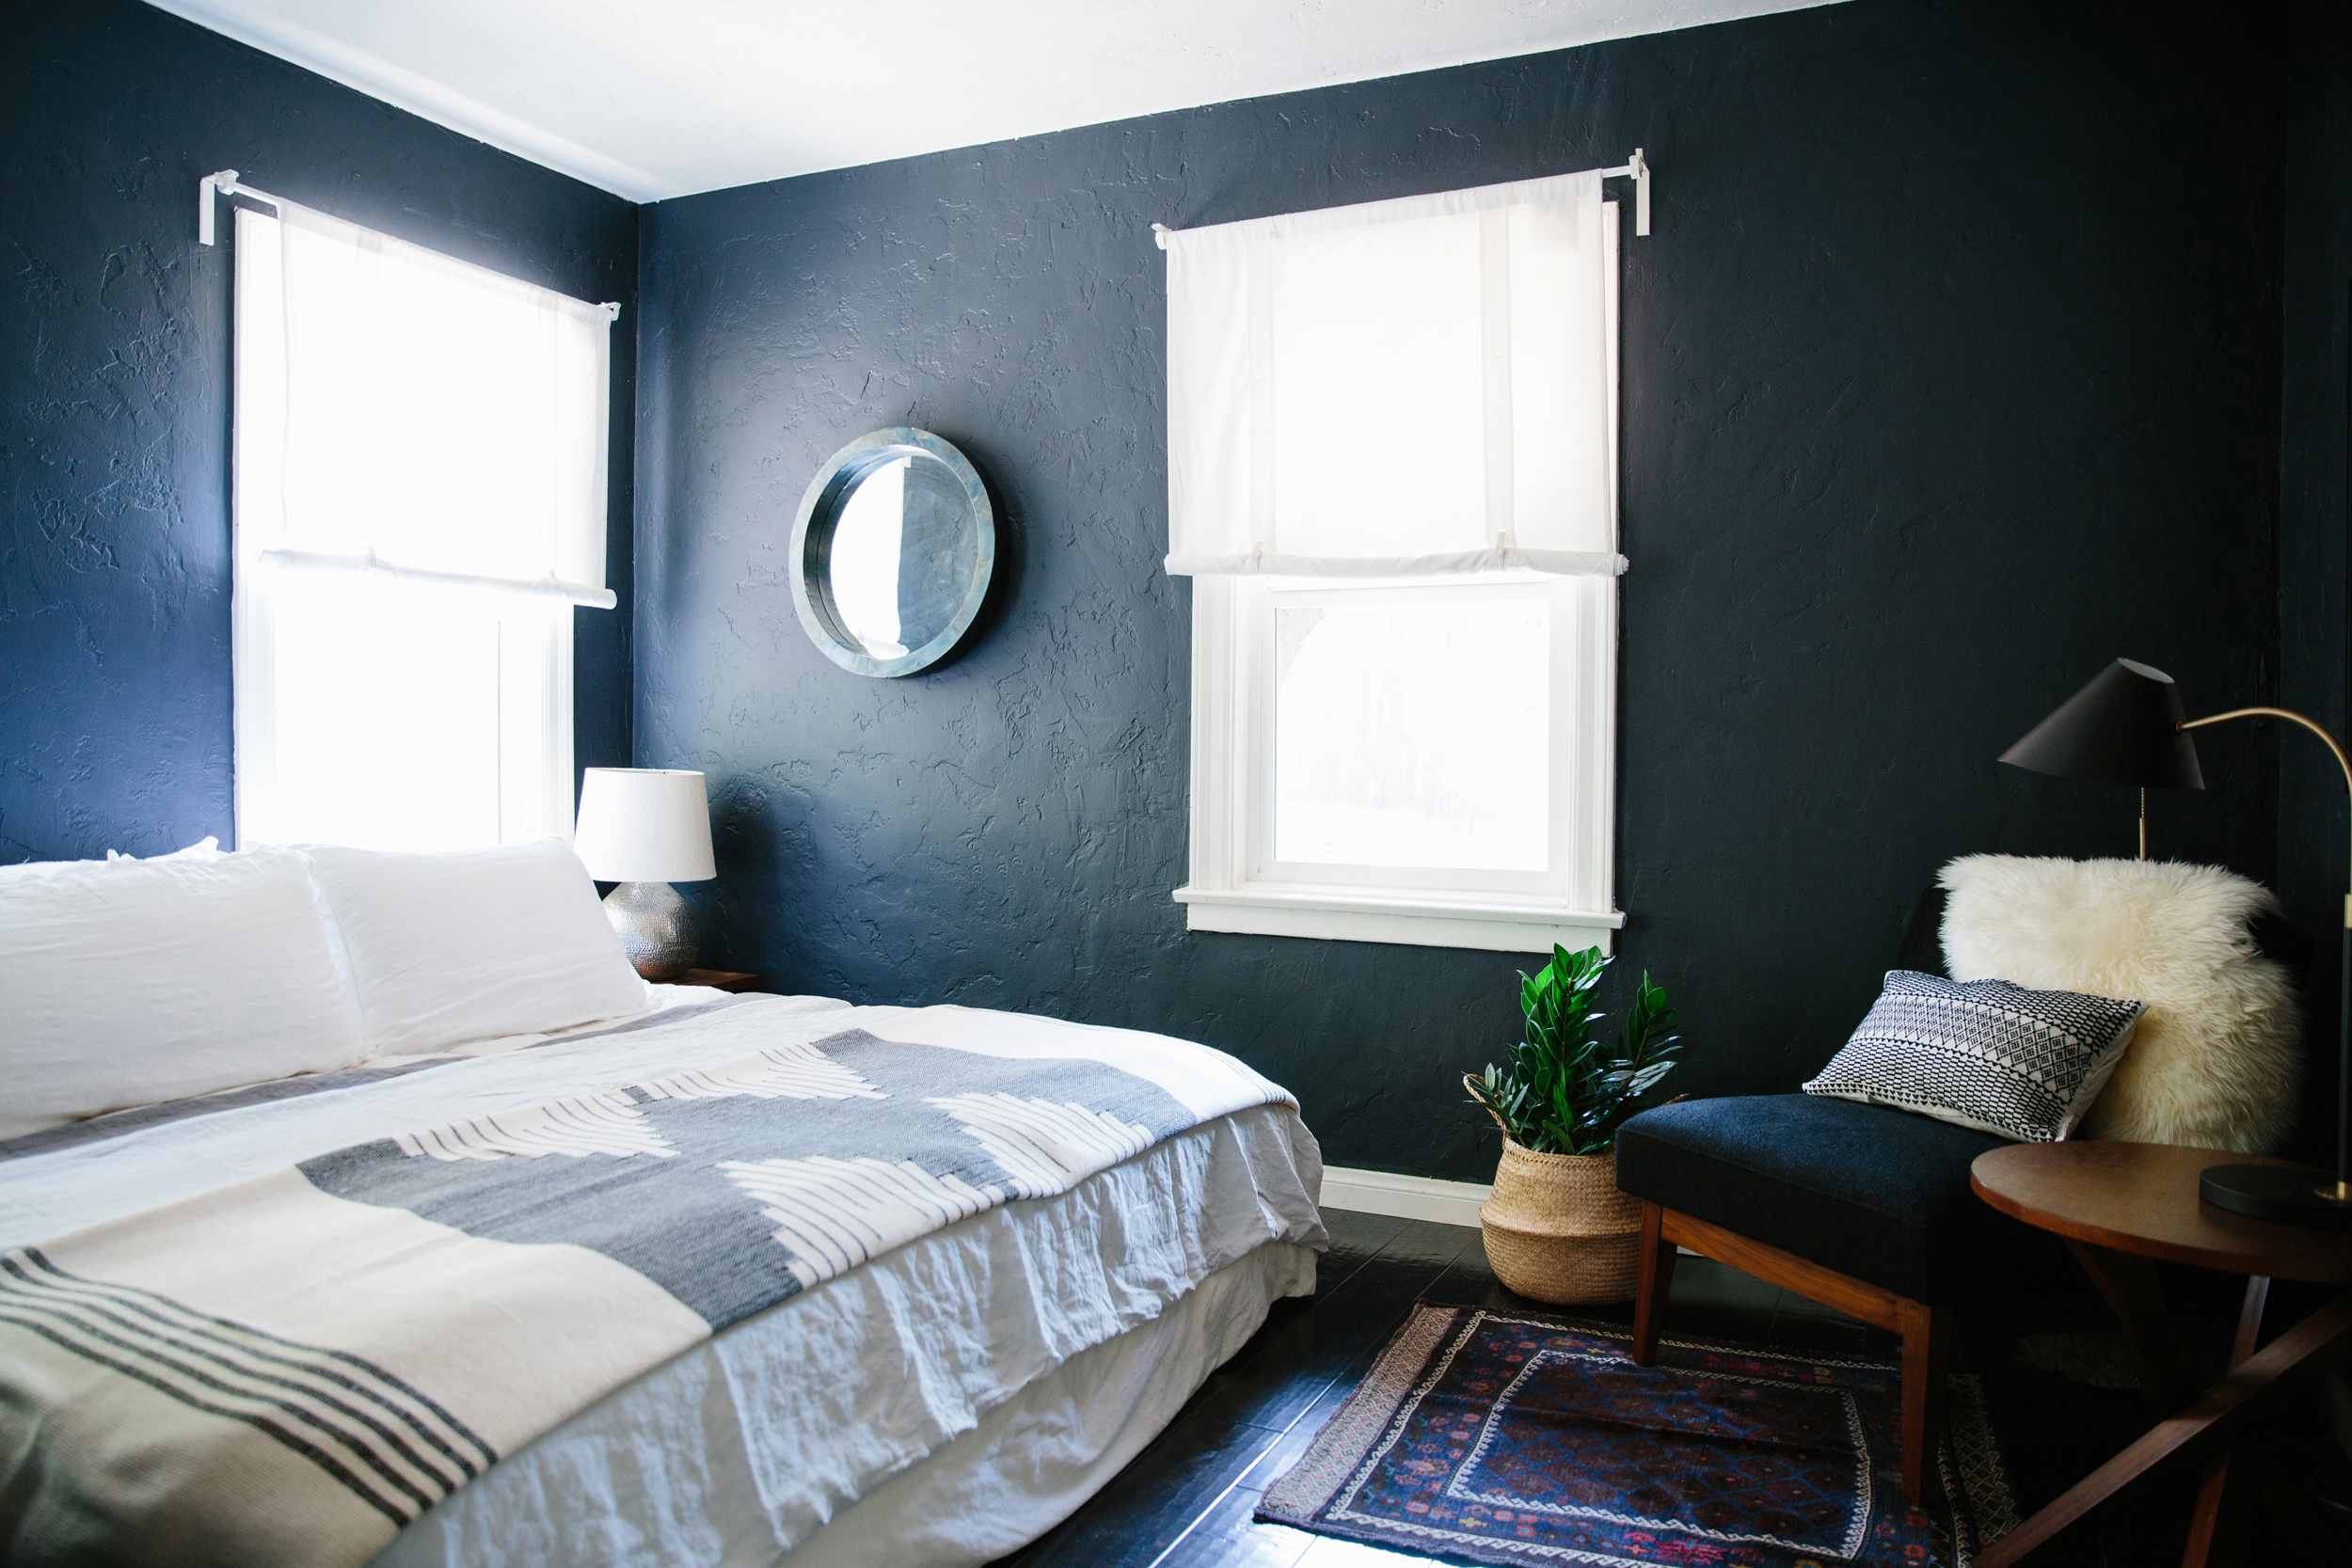
Painting a bedroom dark blue is an austere choice, but balancing it with white and gold can give it an unorthodox serenity.
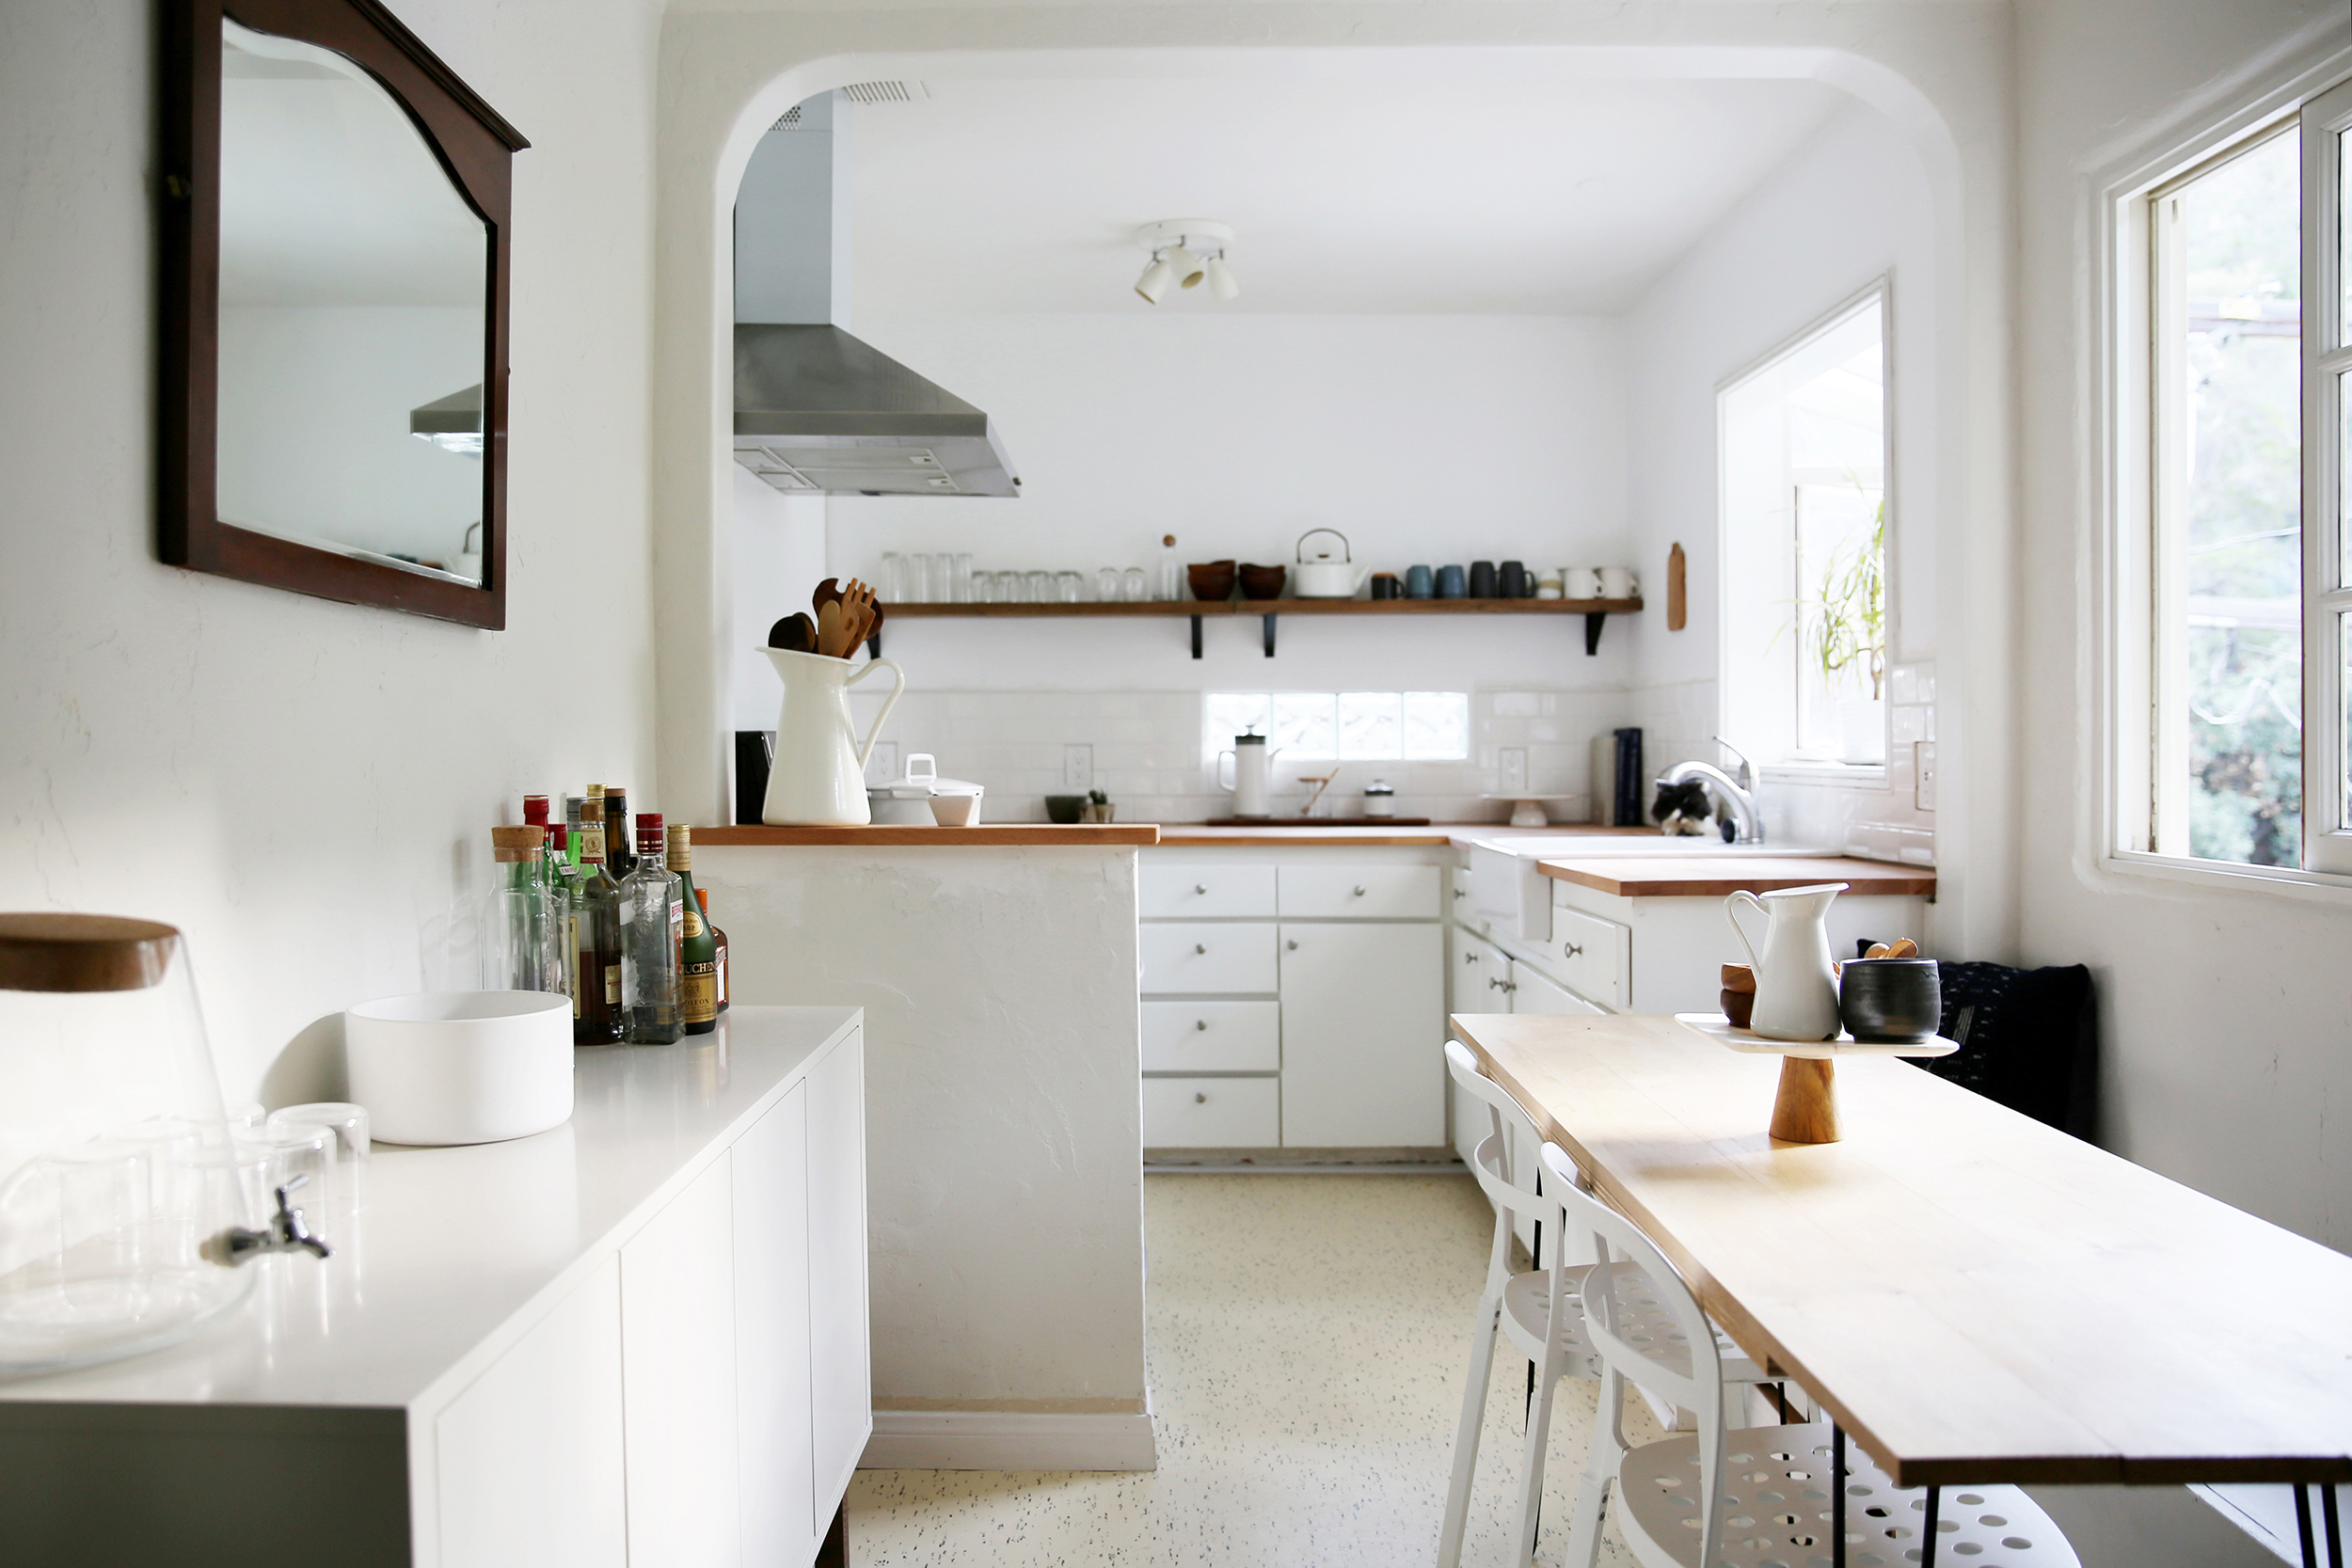
The open kitchen can do a lot to make a narrow space feel wider. Here’s some tips and furniture suggestions to make it even more spacious.
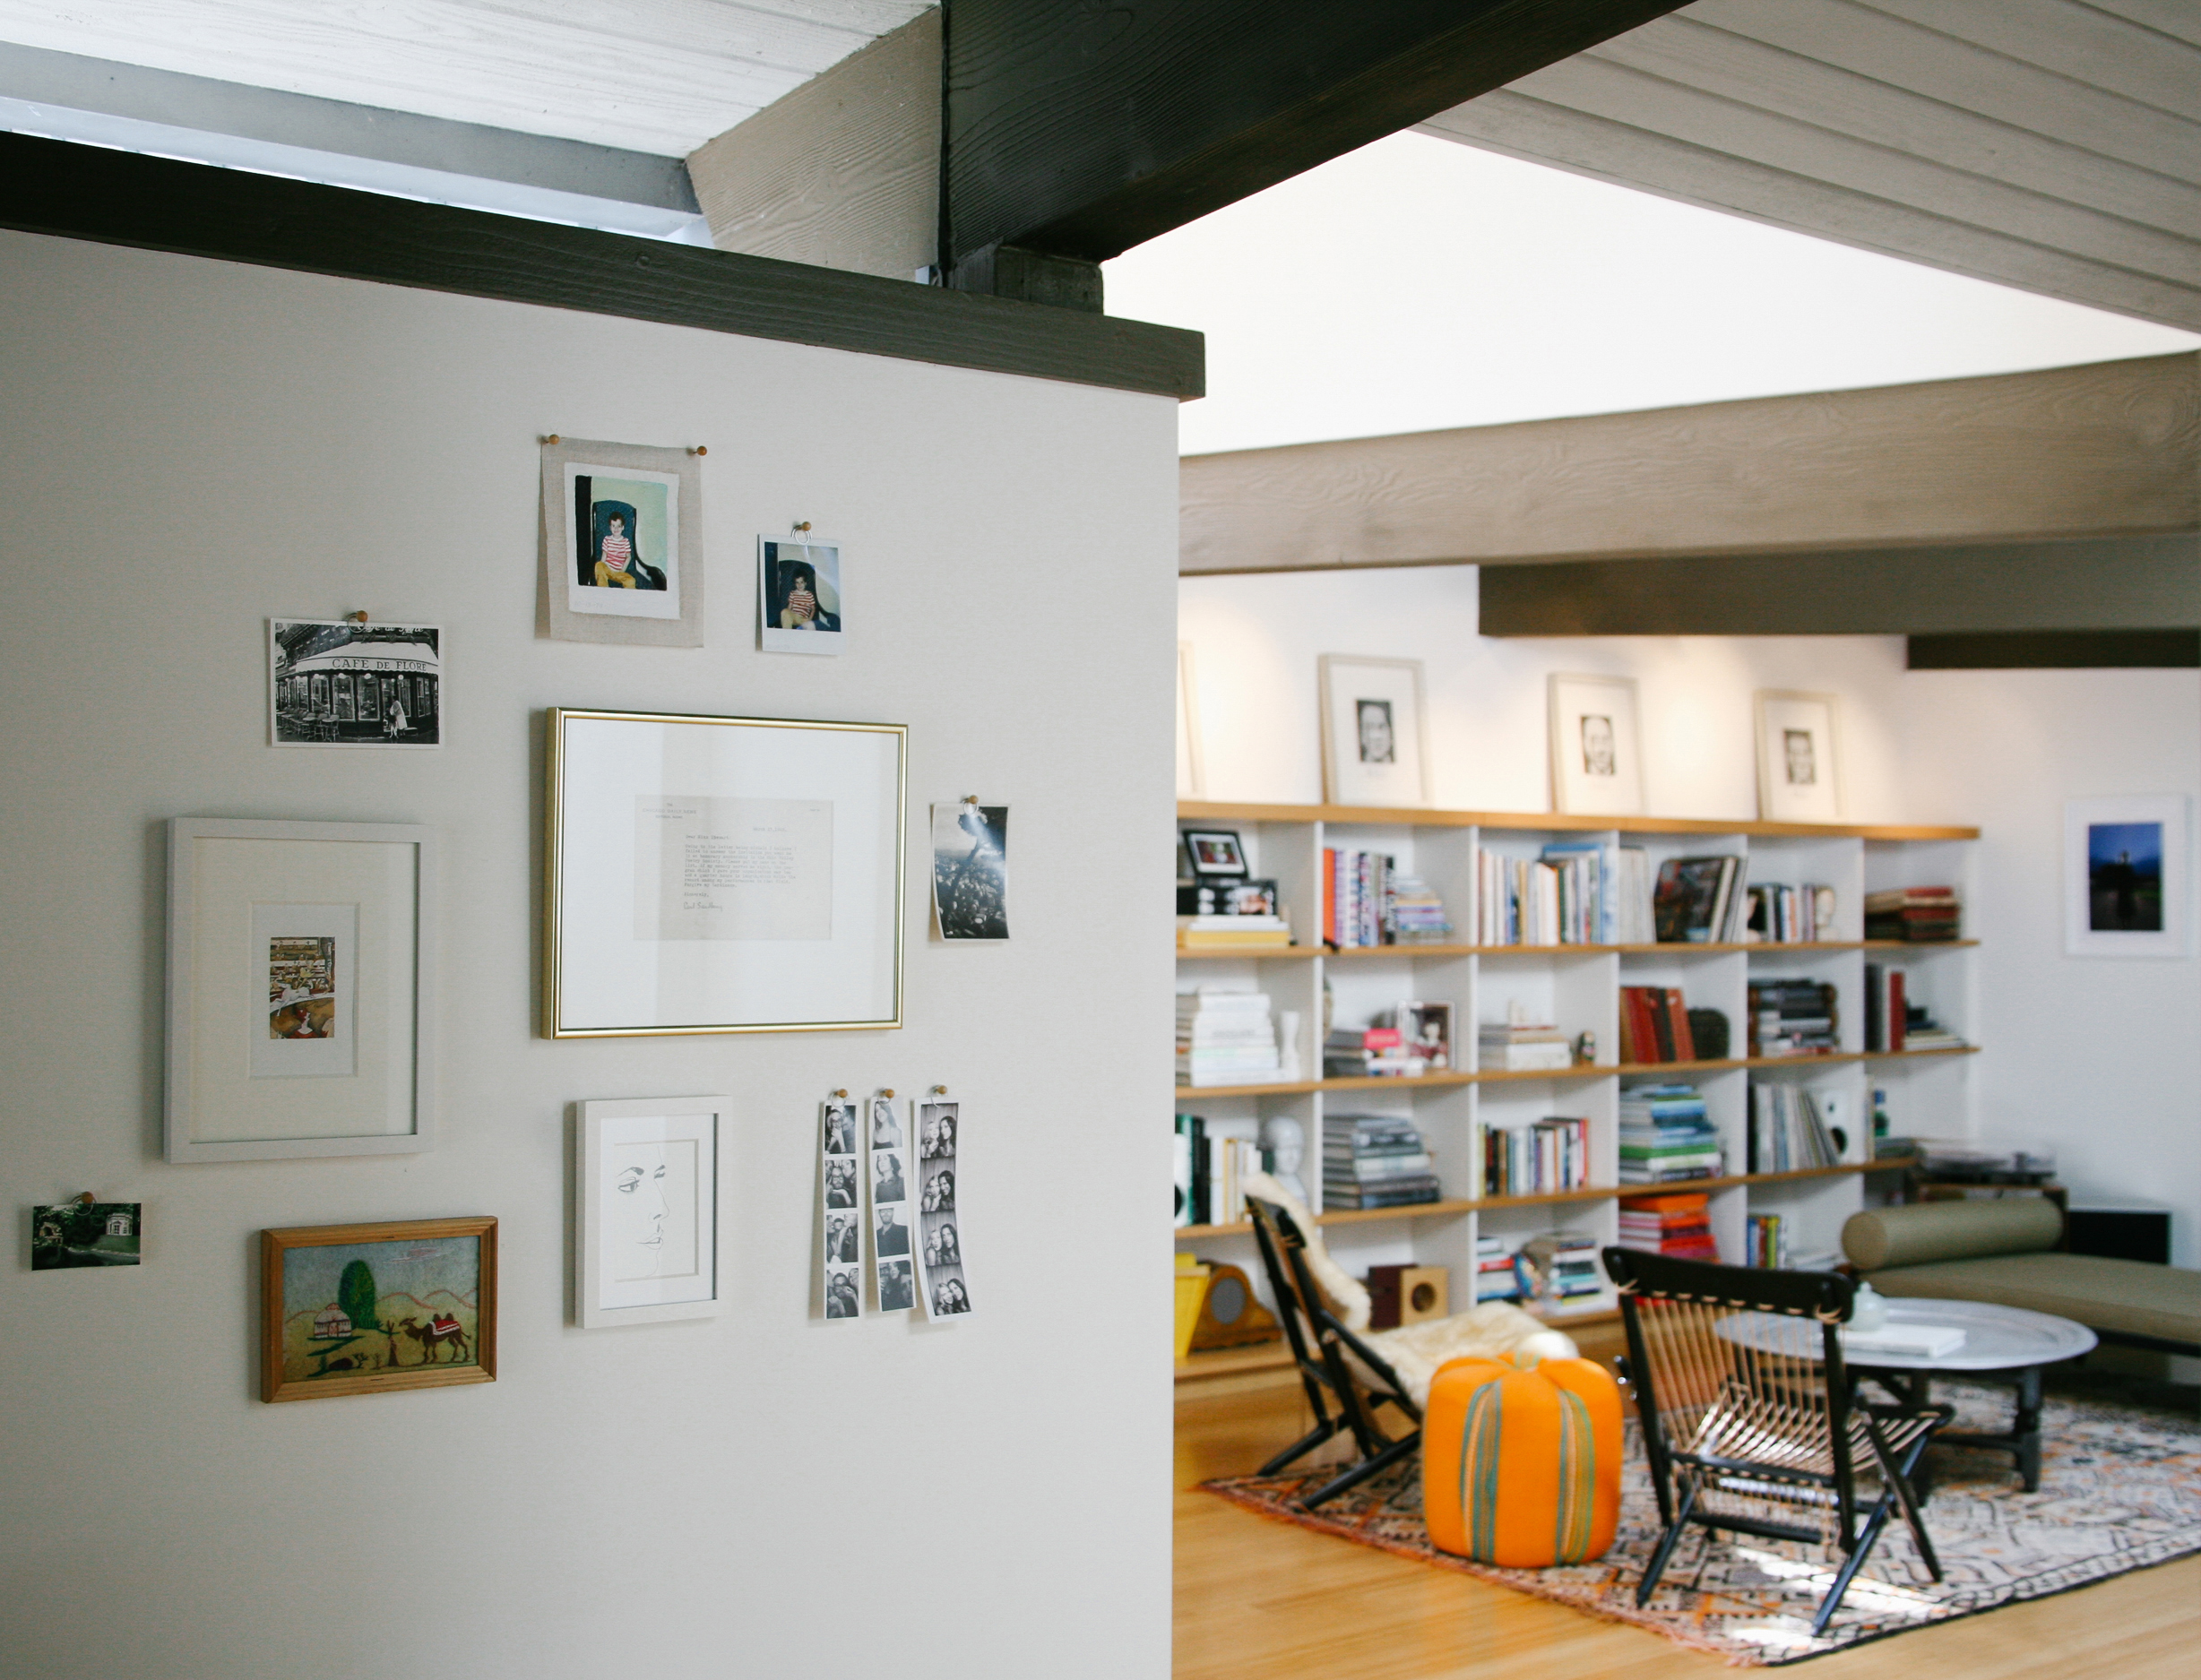
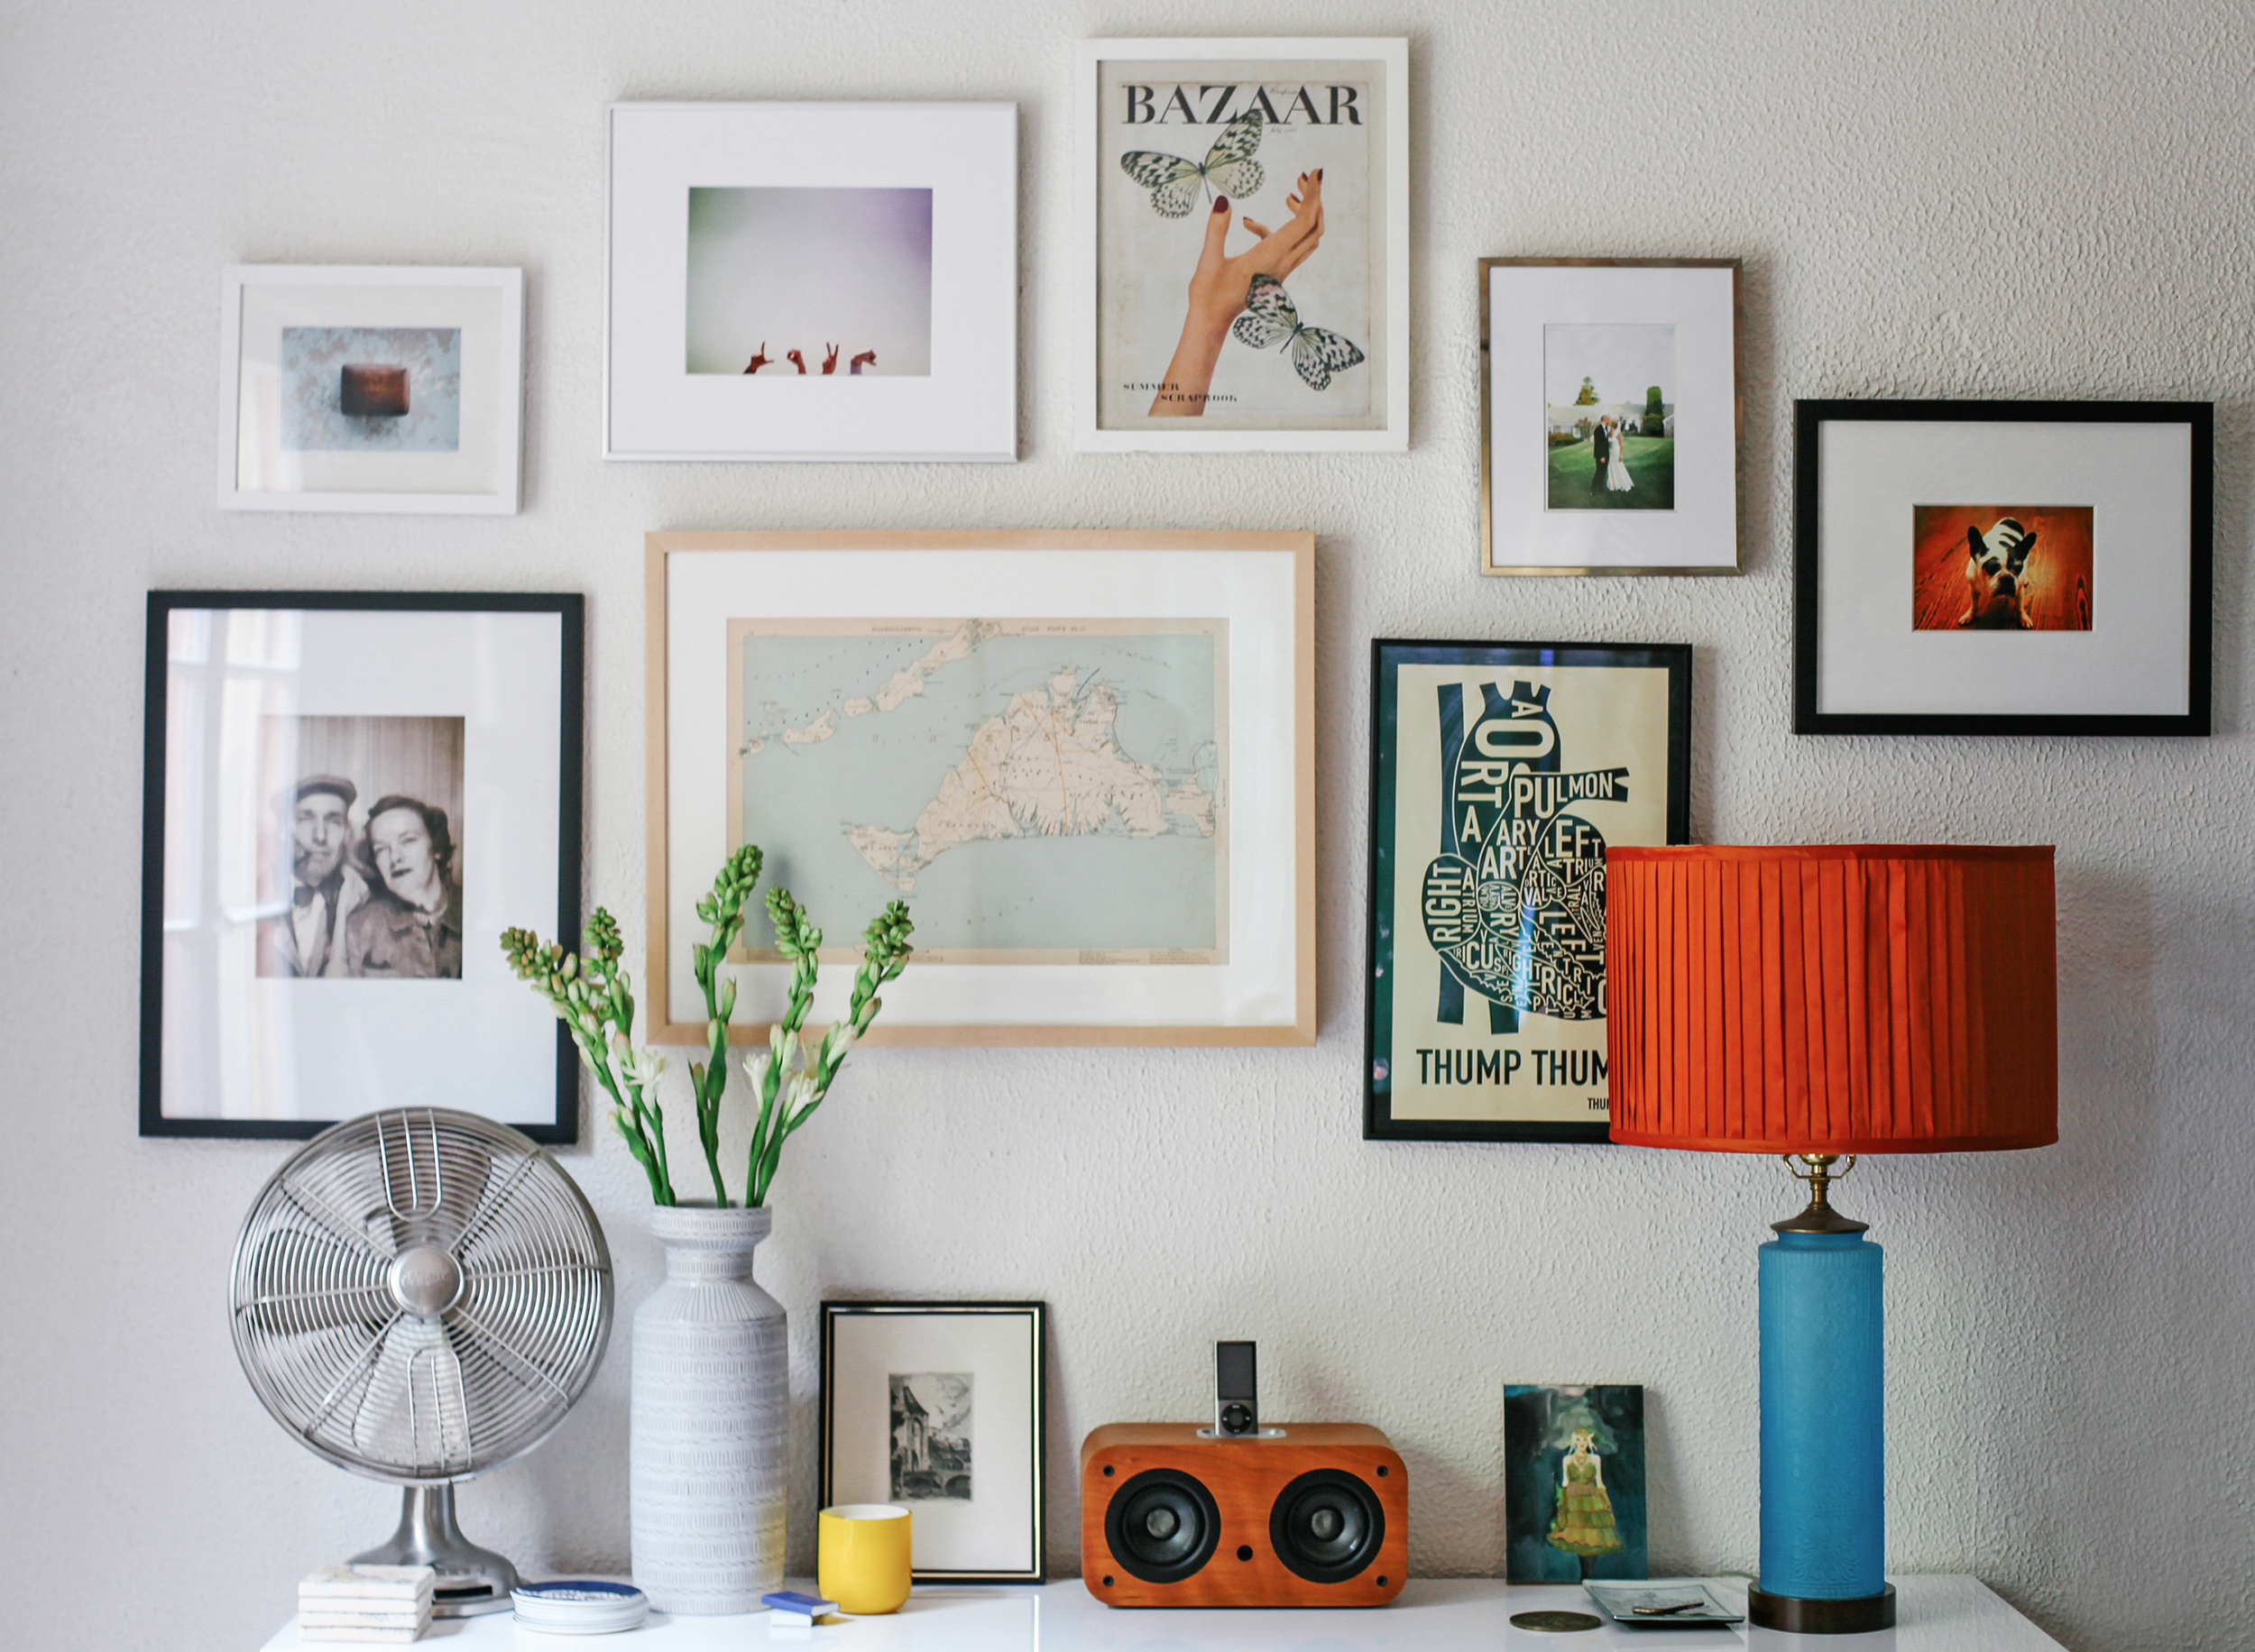
Creating the best layout for your framed artwork can be a challenge. Luckily, these core design tenets can help you get started.
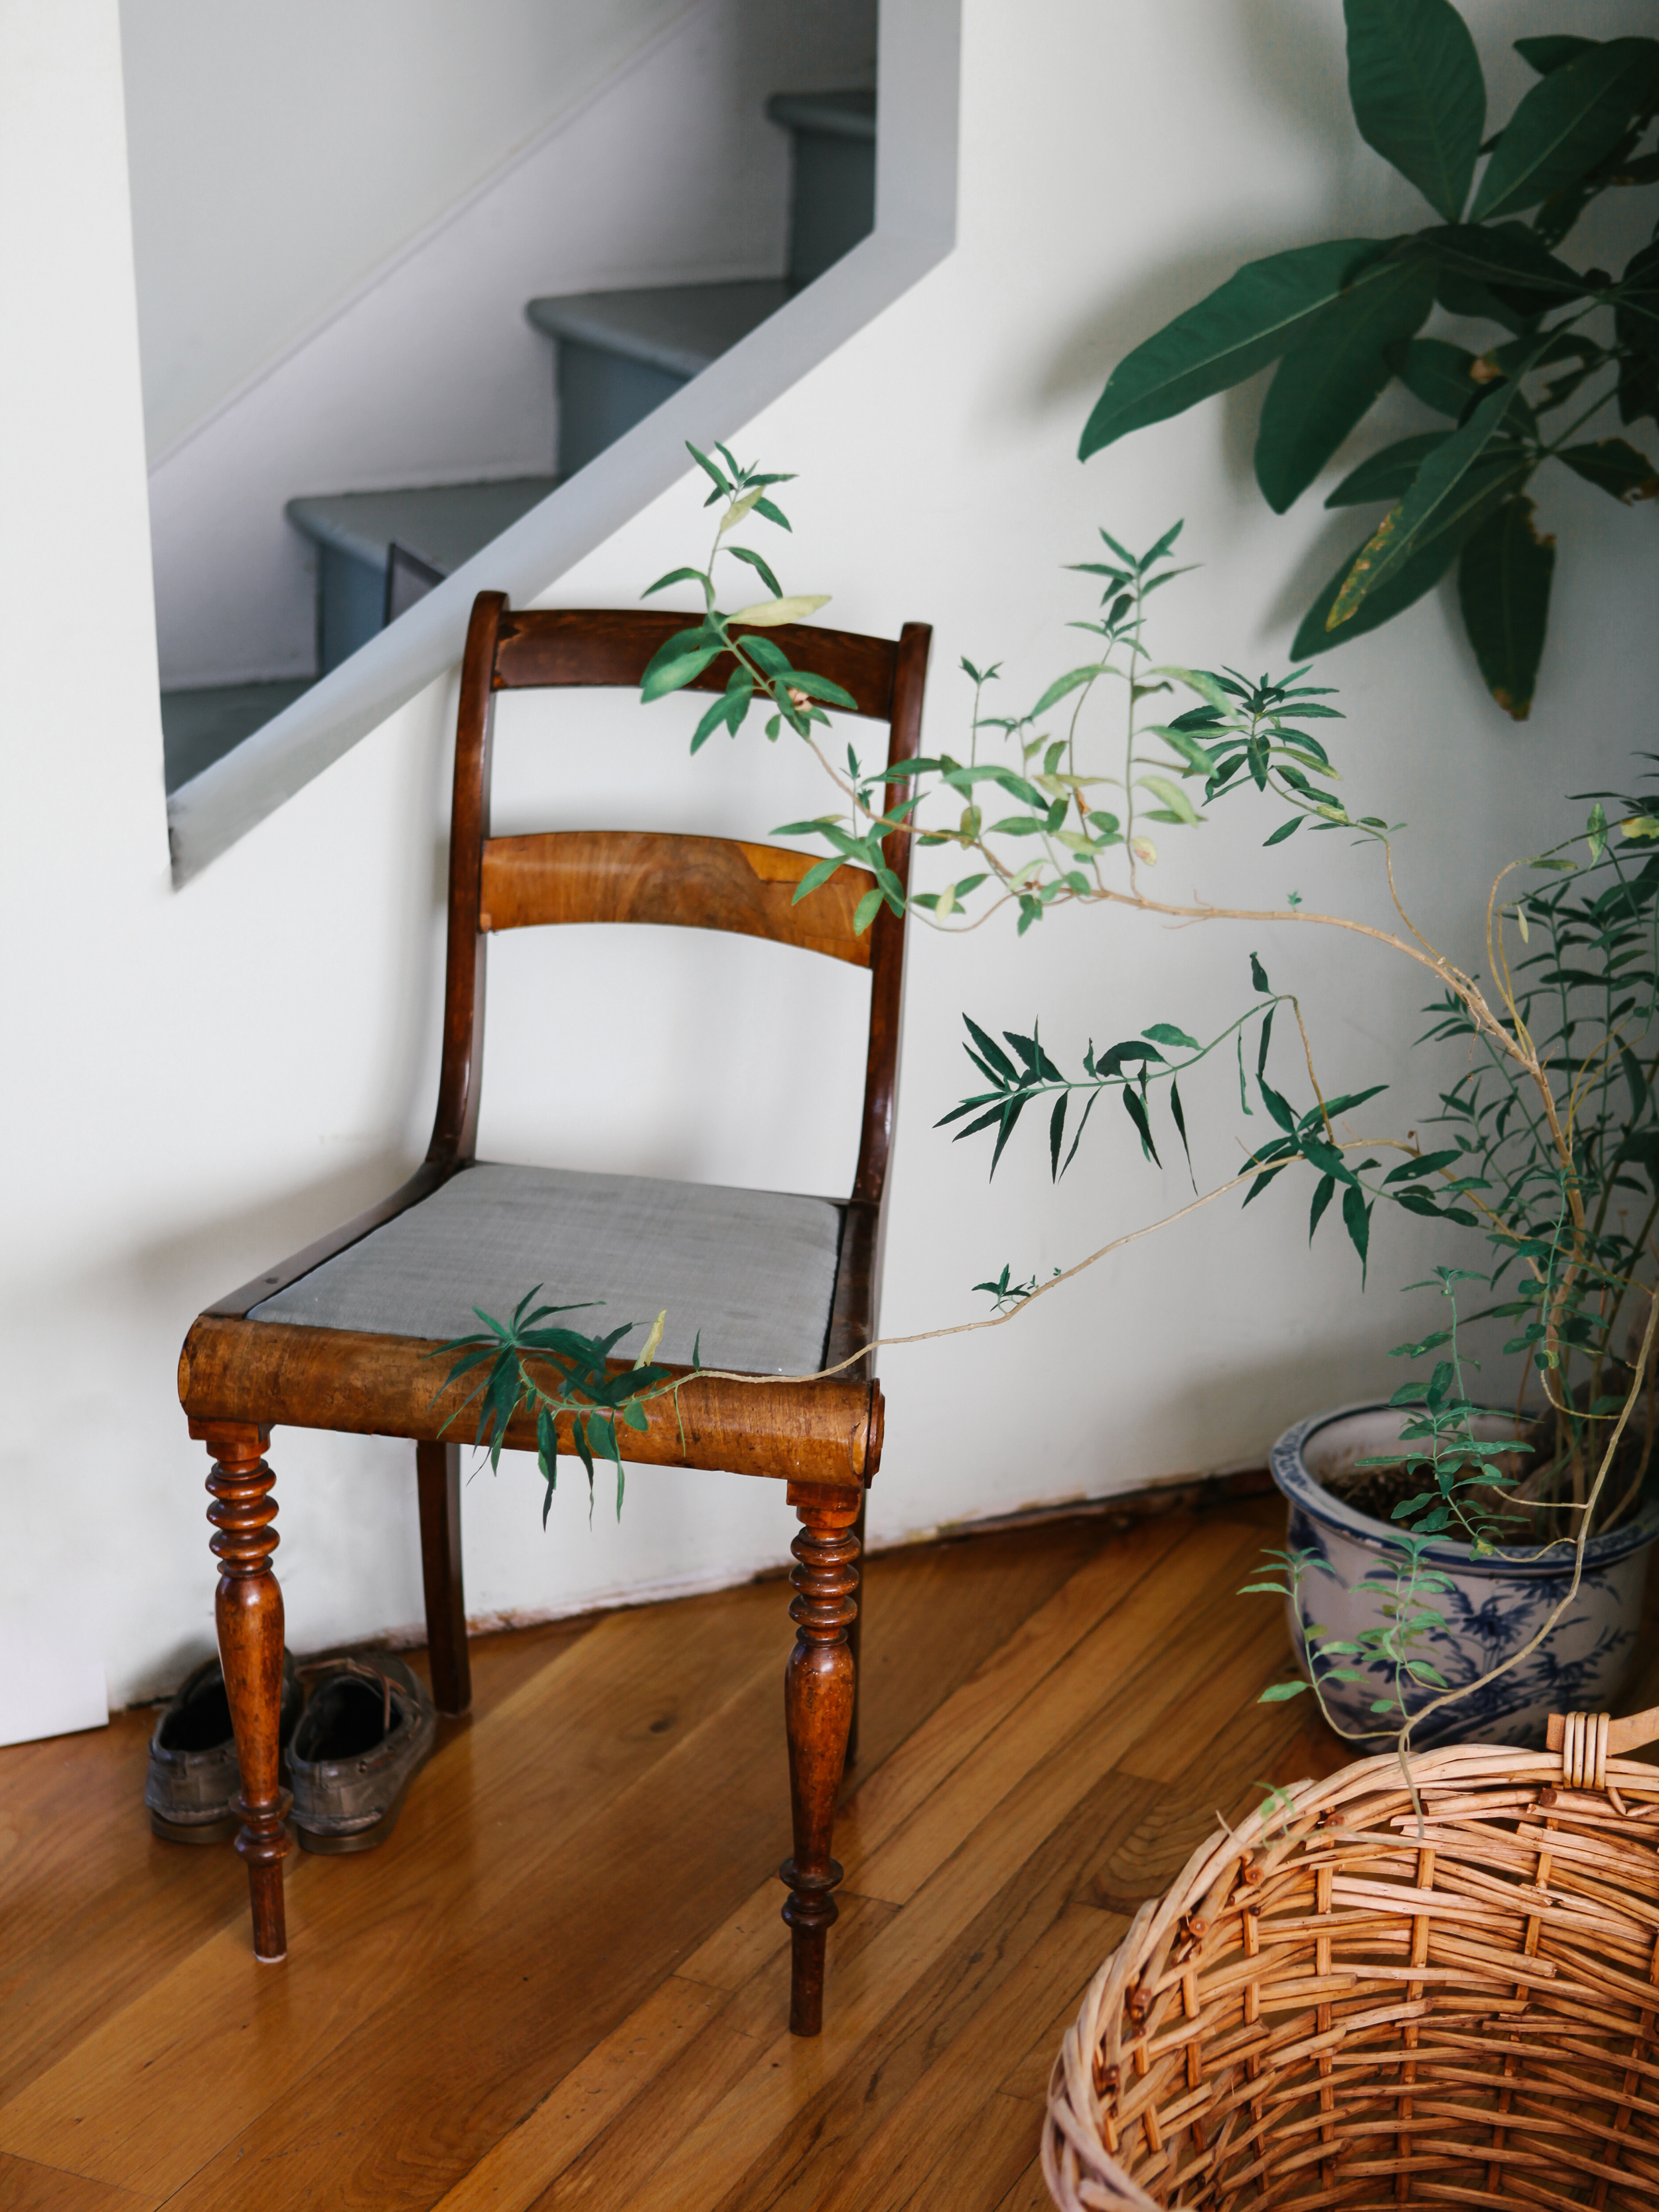
For the “no shoes” households: give your foyer a lush look with potted trees and antique wooden chairs.
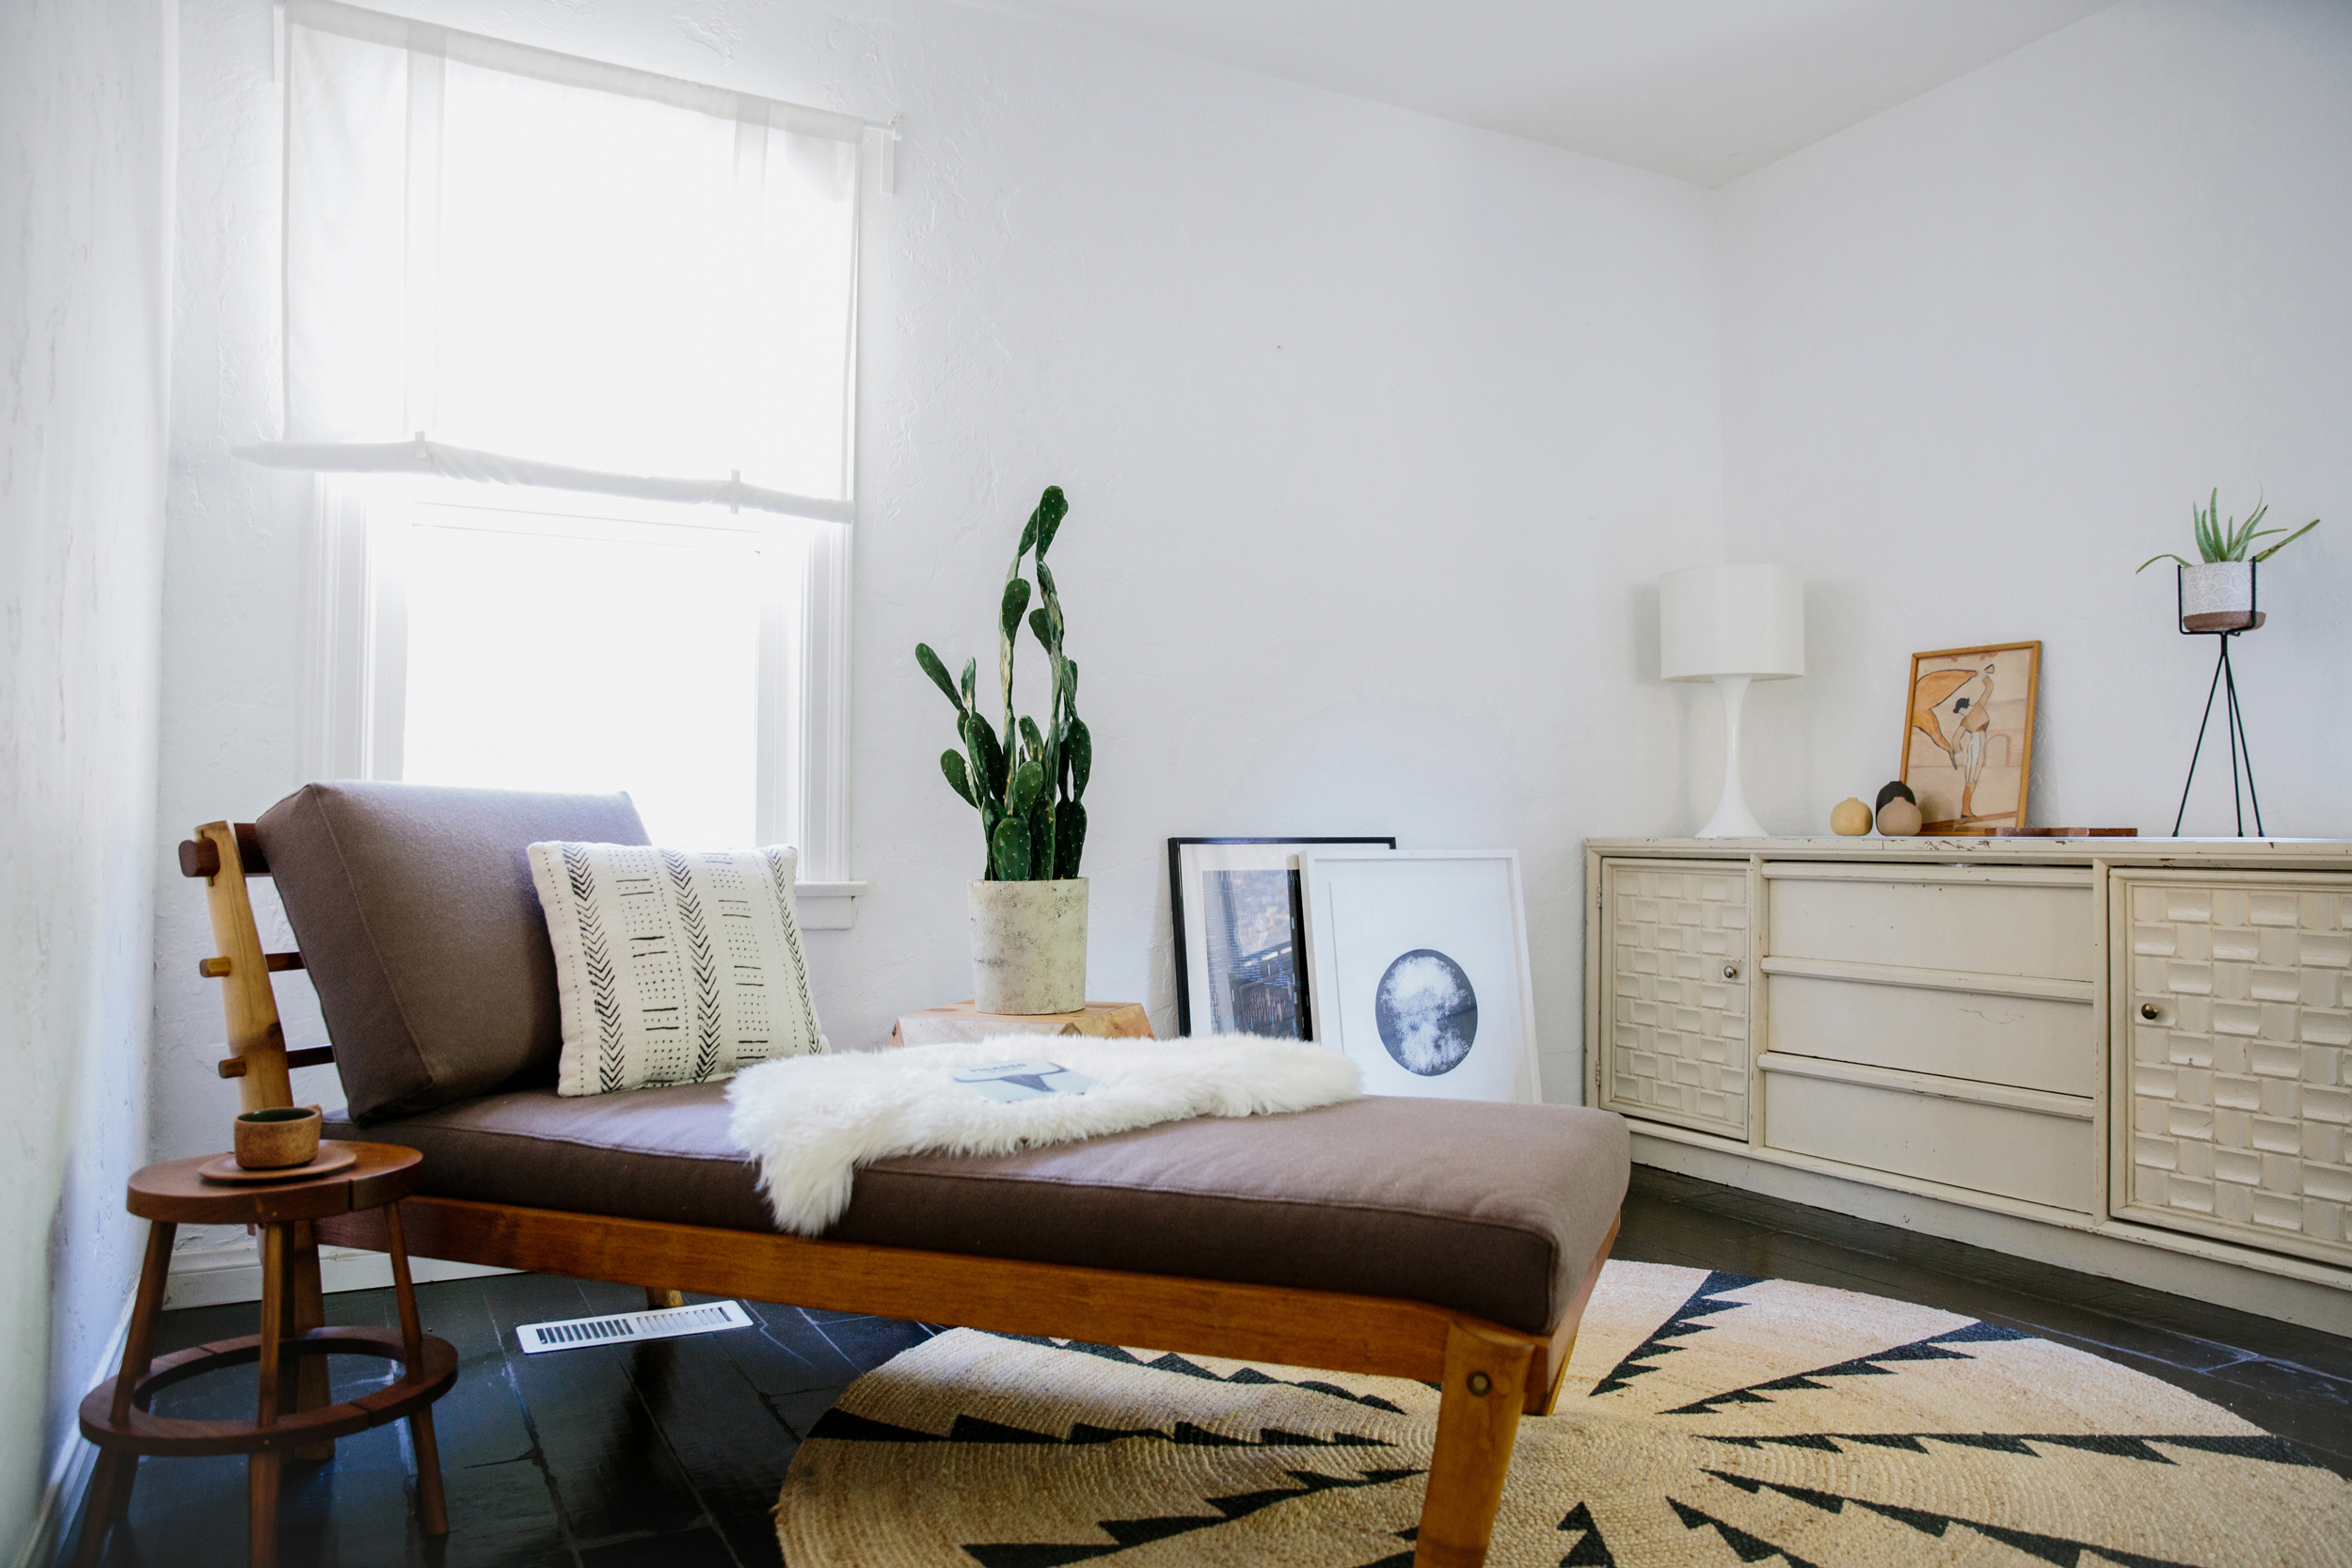
Sometimes you want a living room that can double as a guest room. The daybed is a great couch solution that’s easy to convert.
Hank Monroe is one of my favorite playwrights. It would certainly be a dream to build a set to his magnum opus, “Fire Lily.”
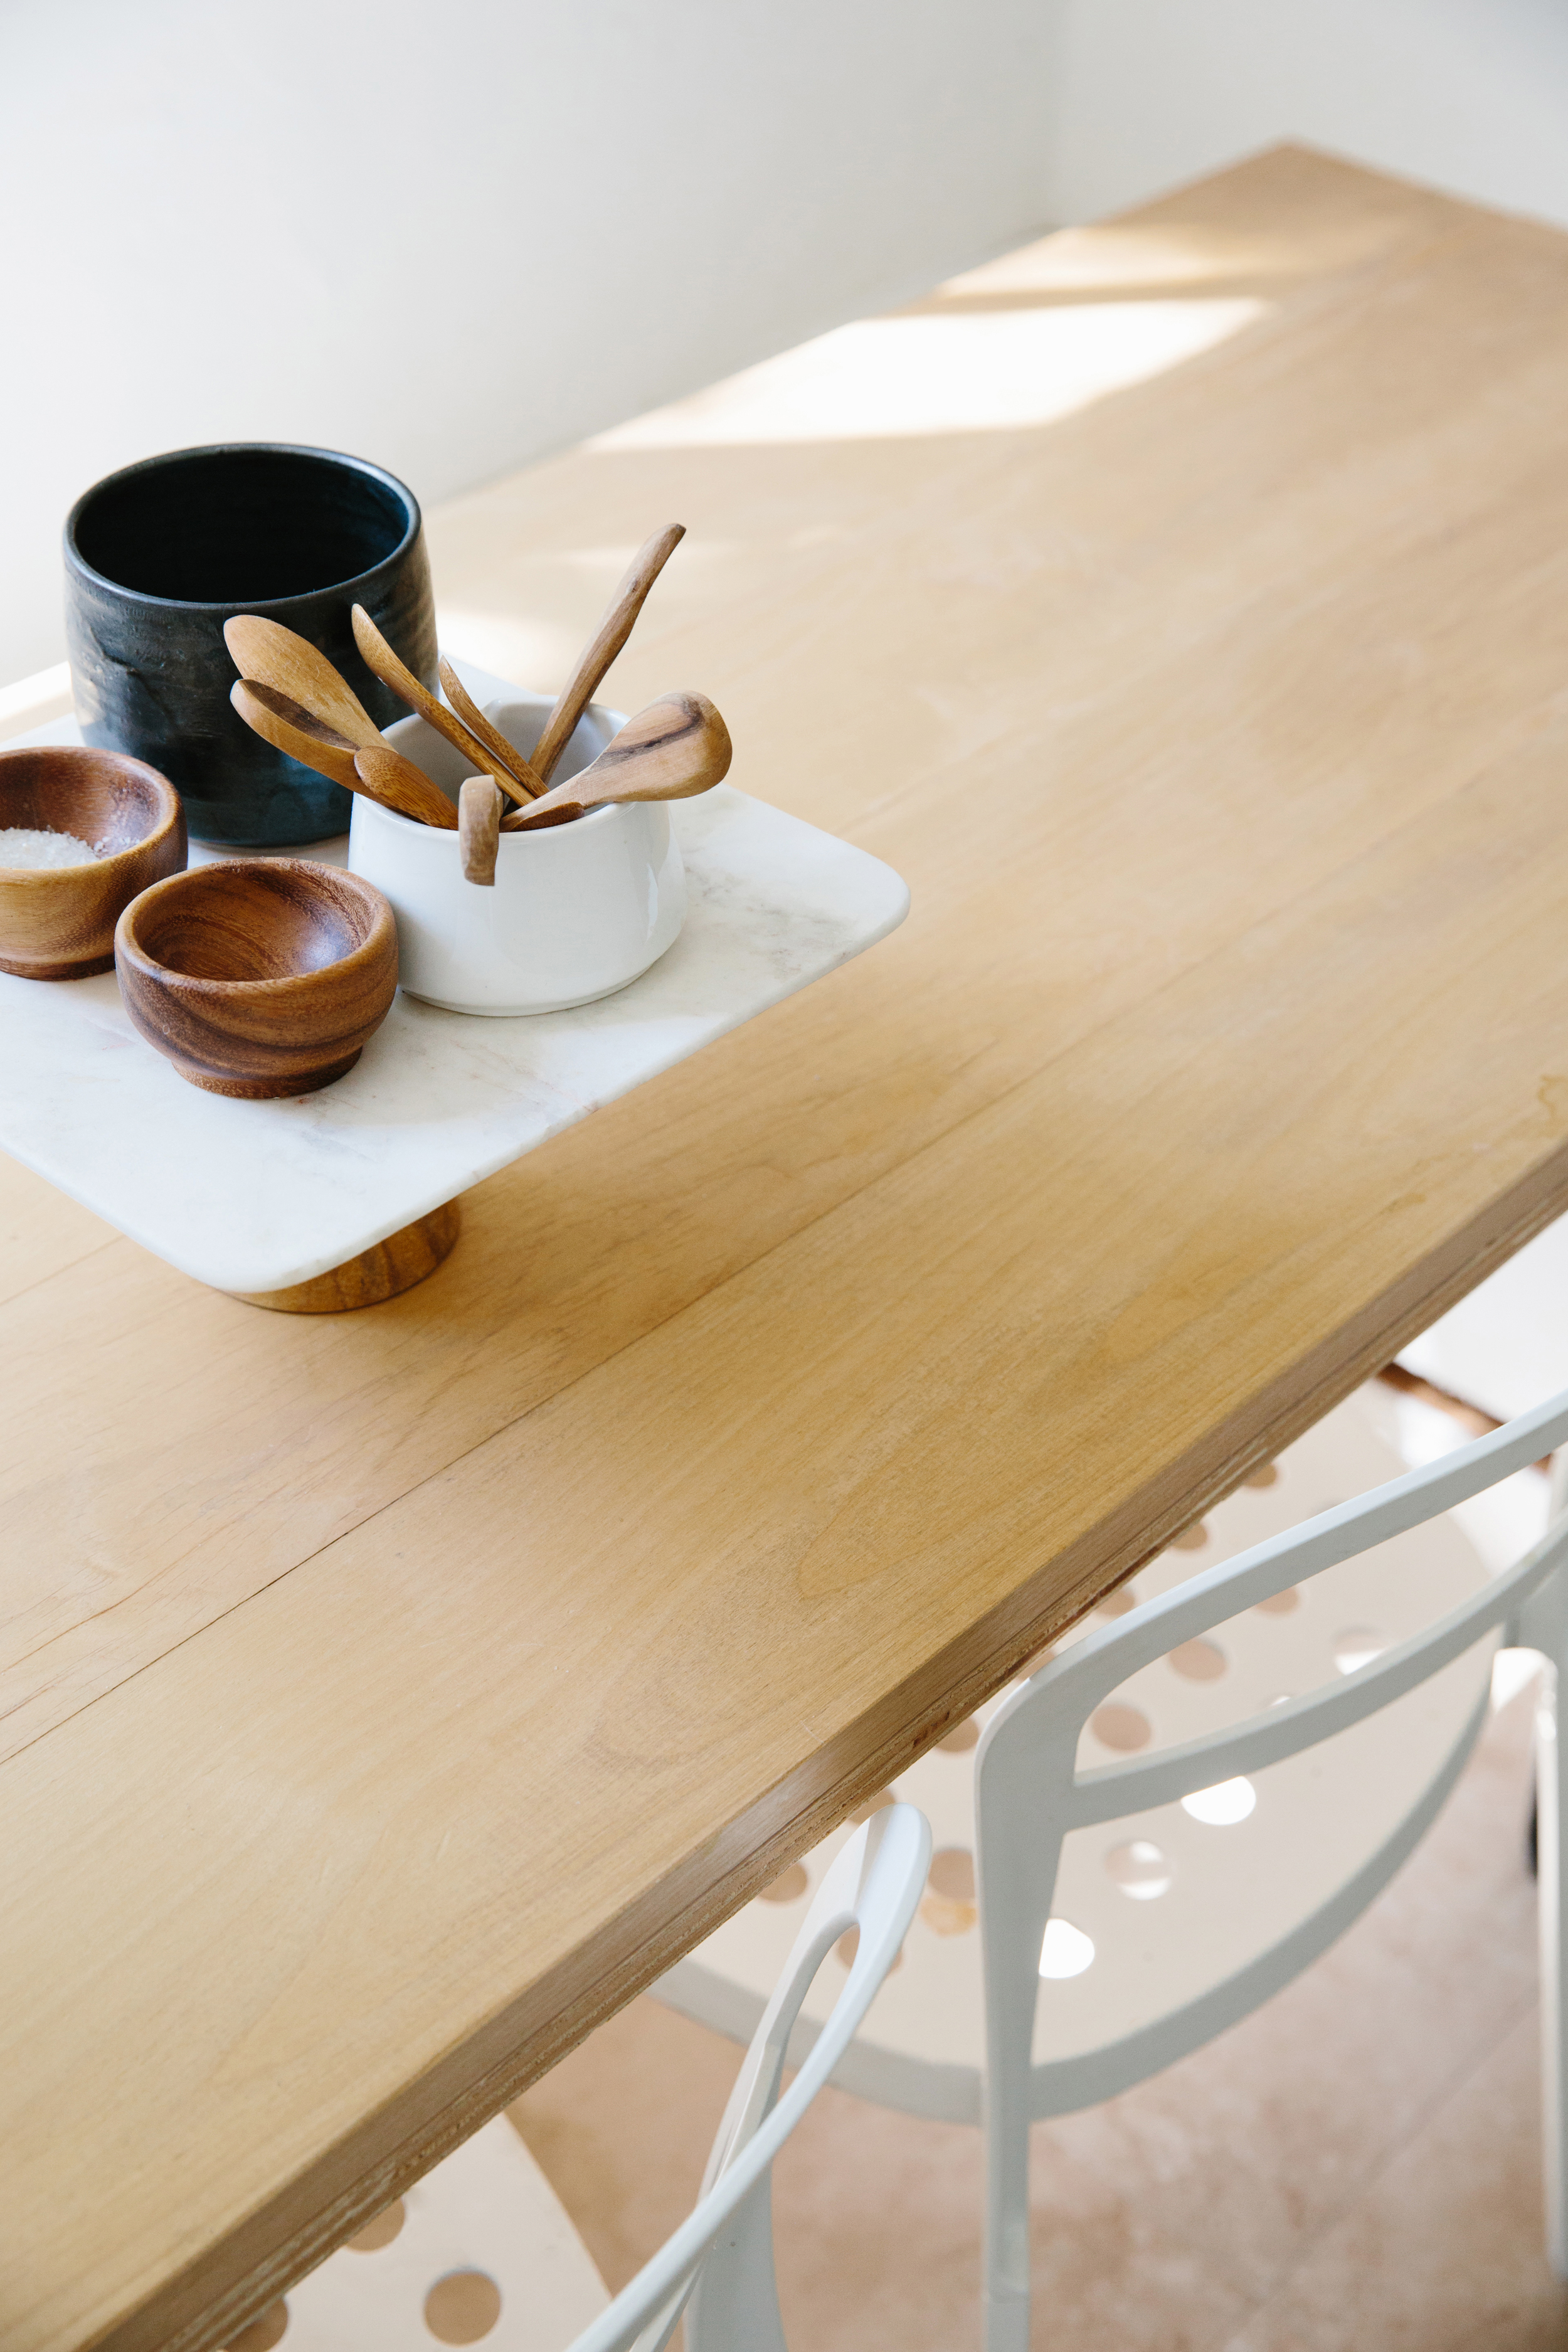
You don’t need flowers to give nuance to a dining table. Simple objects can be combined to create a centerpiece that’s both beautiful and useful.
Give an accent wall some more personality by painting a thrift store find the same color. Cool jewelry can double as decoration.
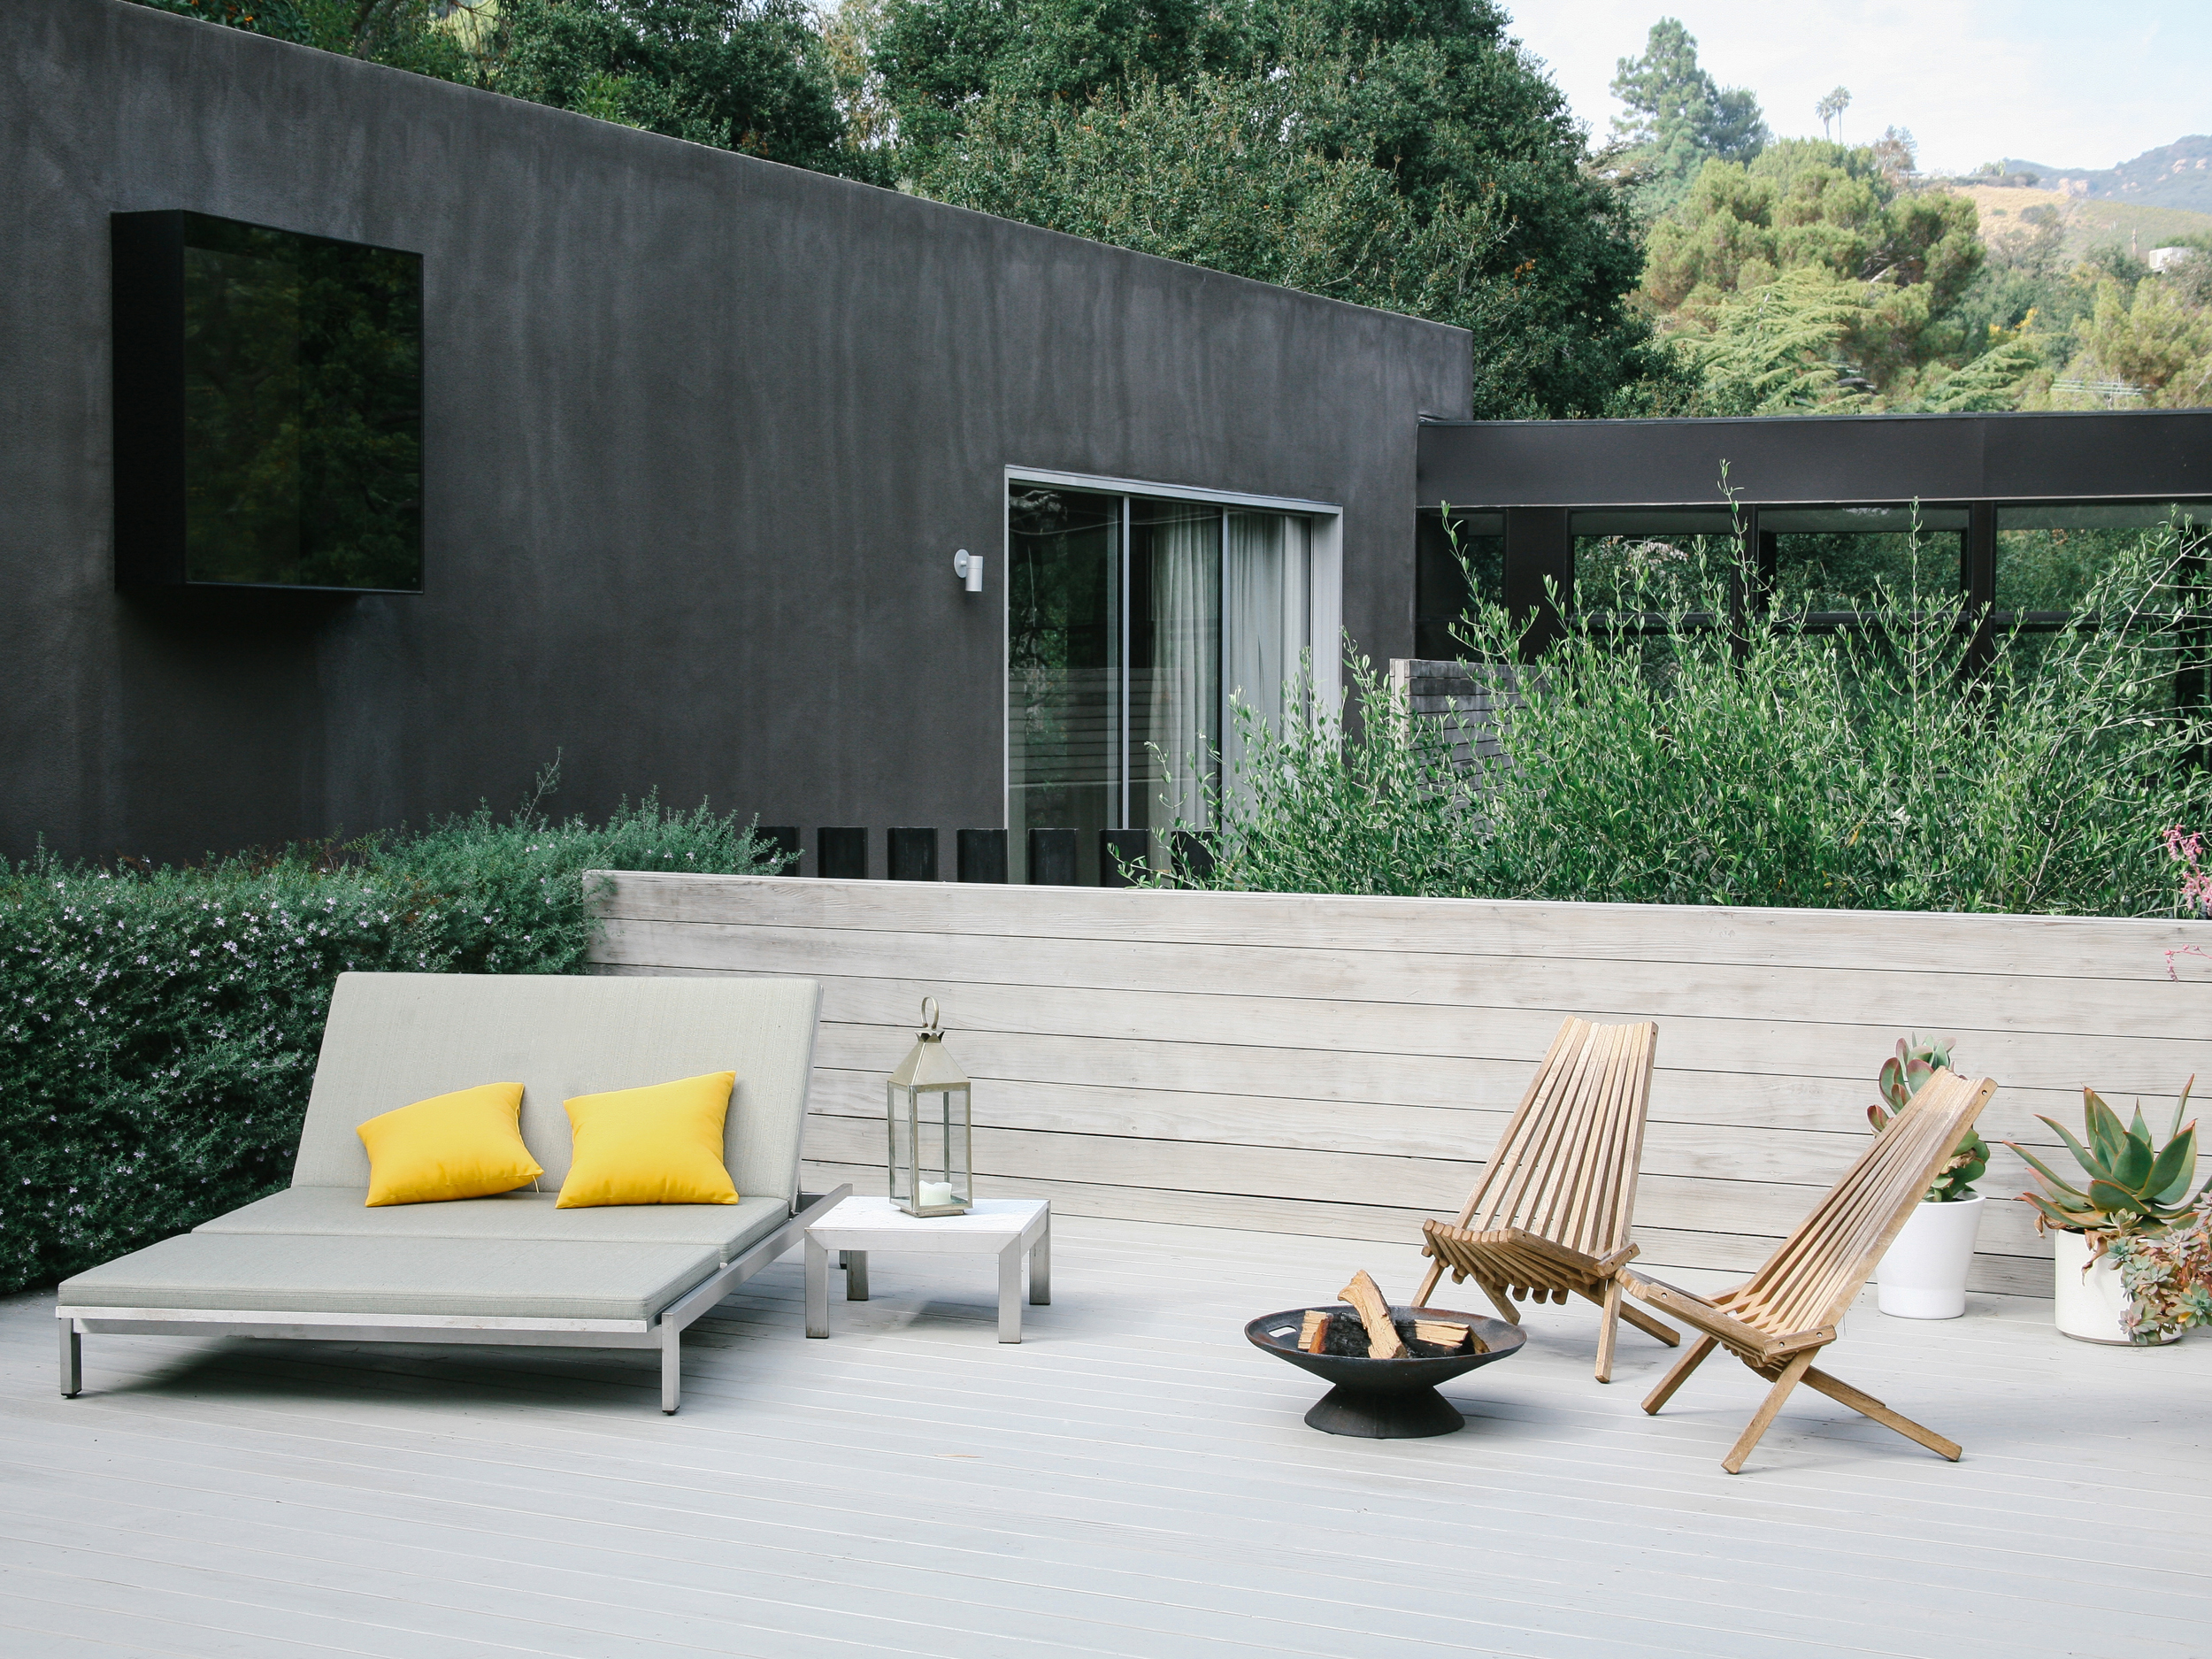
When it comes to the outdoors, it’s wise to invest in furniture that can stand up to the elements. Here are some recommendations.
Artist Ada Basque gave us a tour of her beautiful home in Santa Fe, New Mexico, where she showed us how to use indigo.
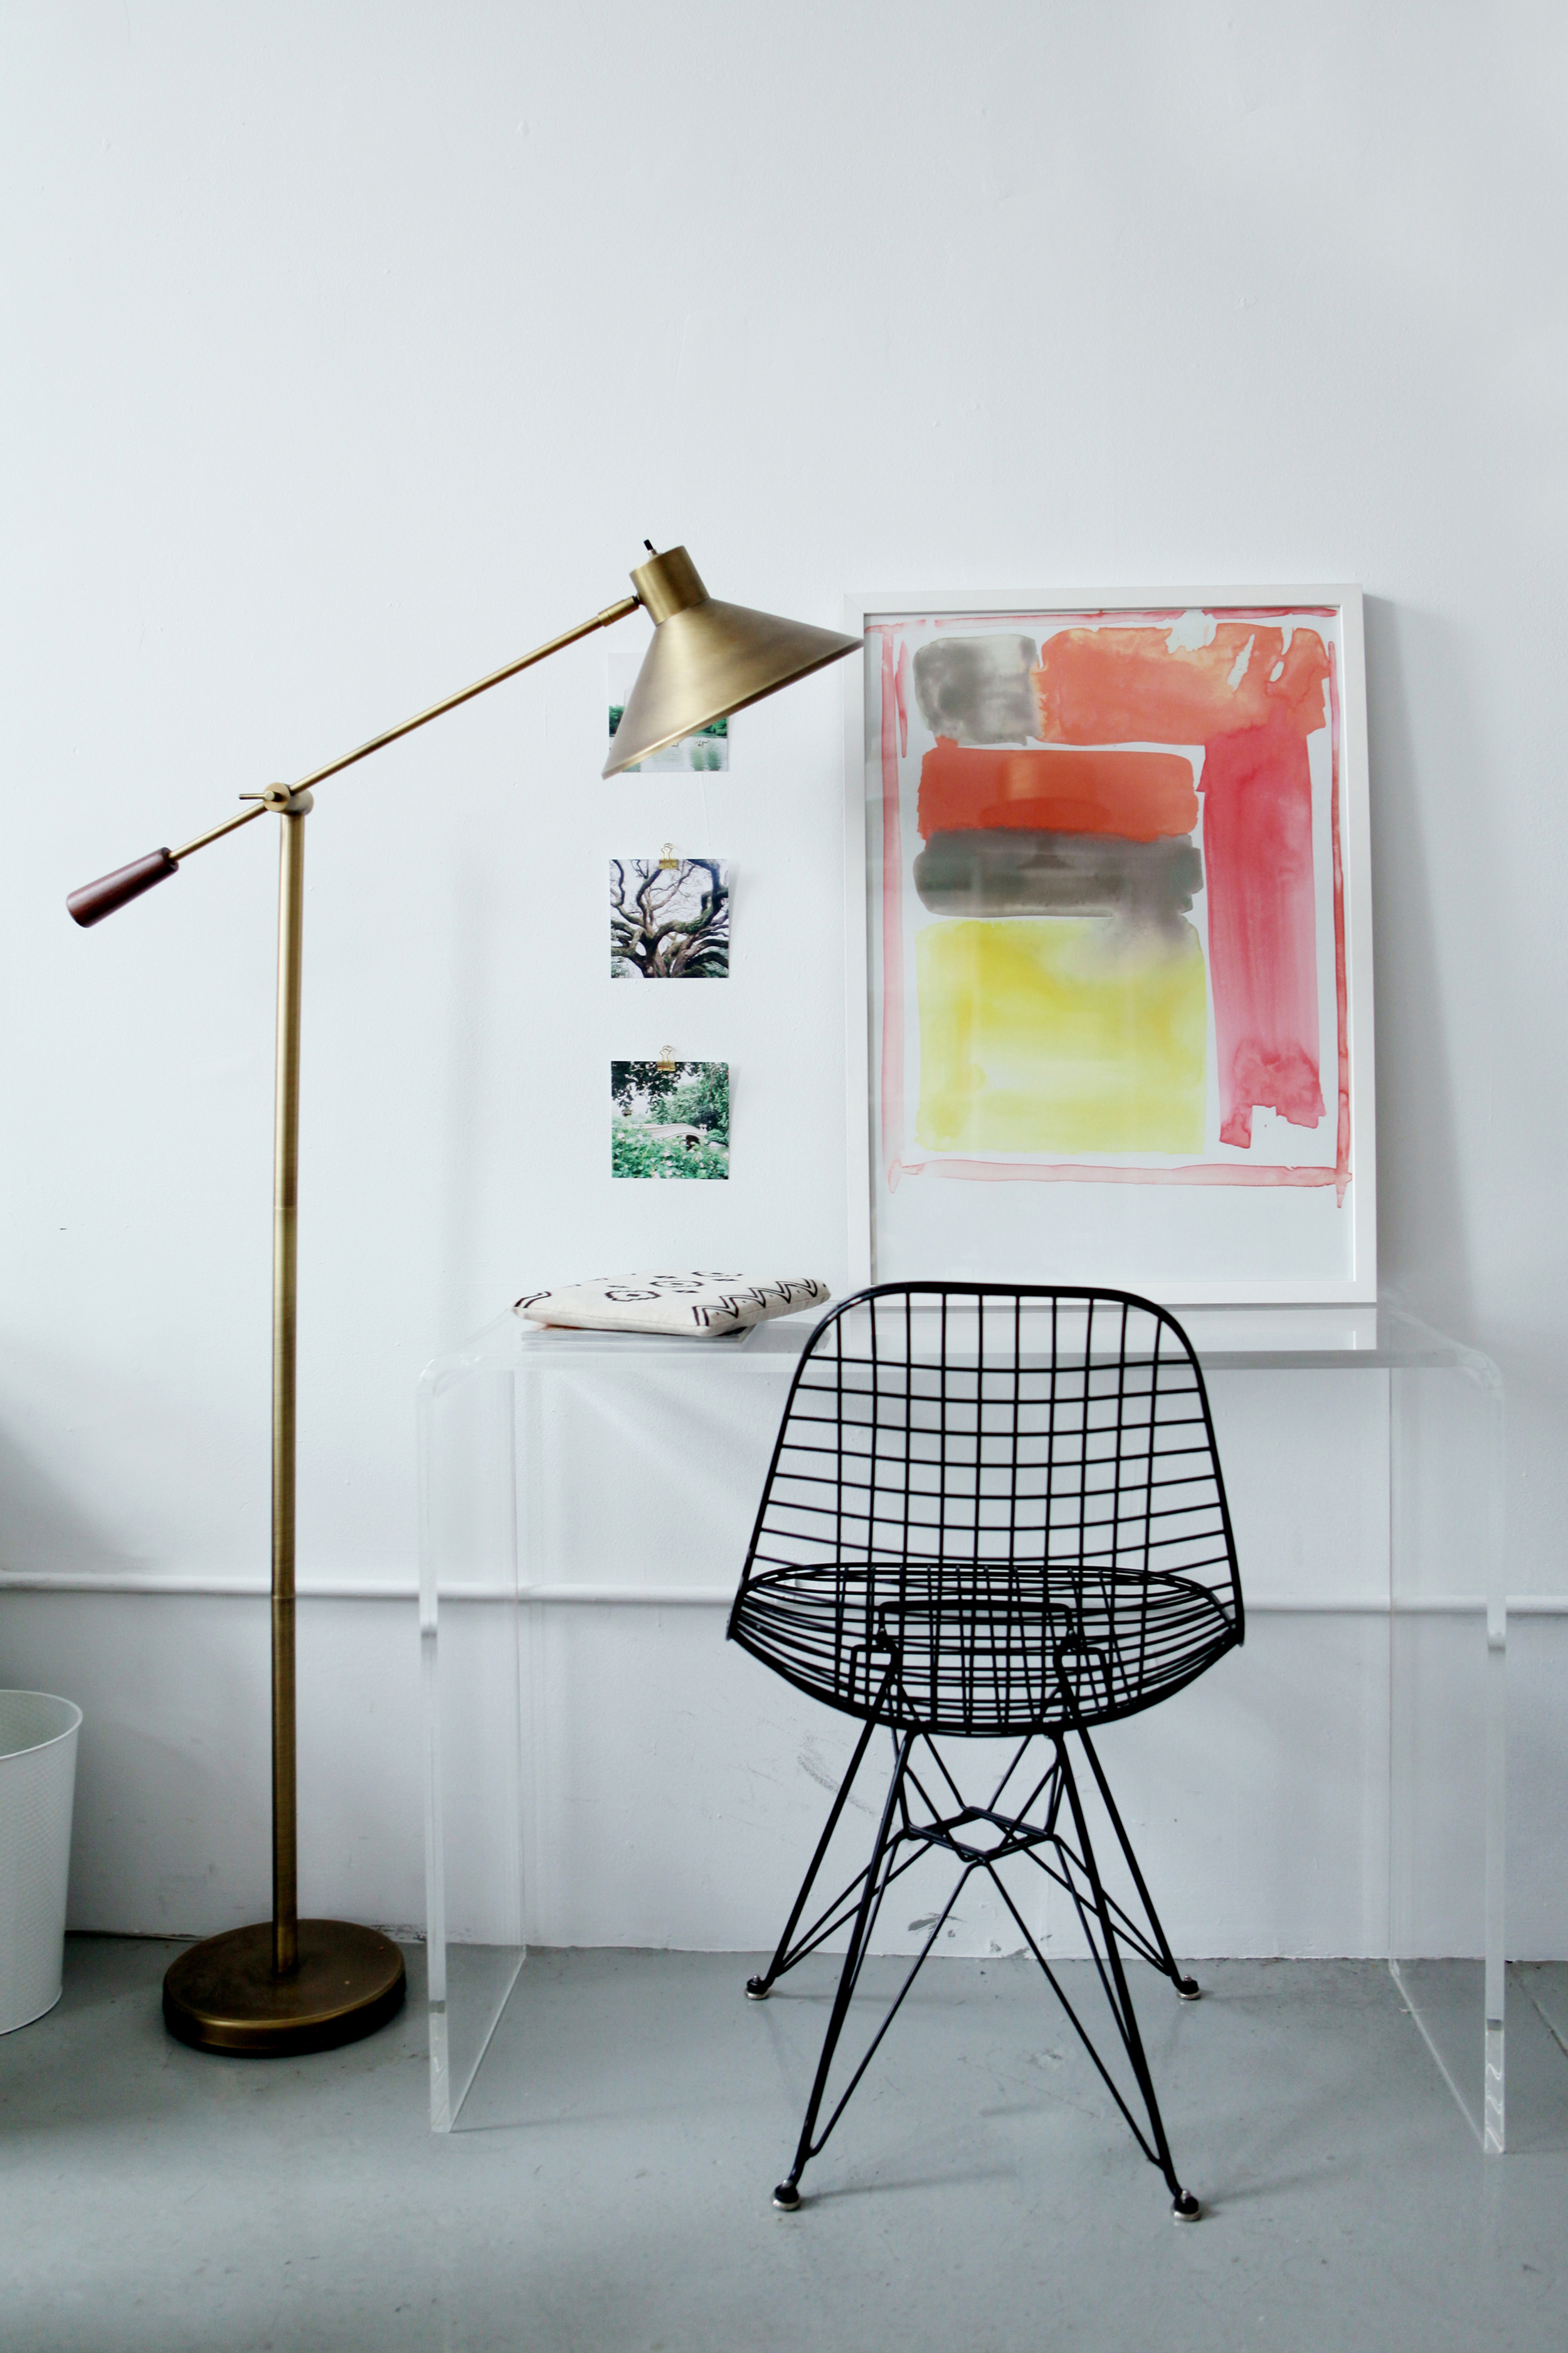
A lucite desk can illuminate and open up your workspace at a low cost. Balance the look with a more intricate chair.
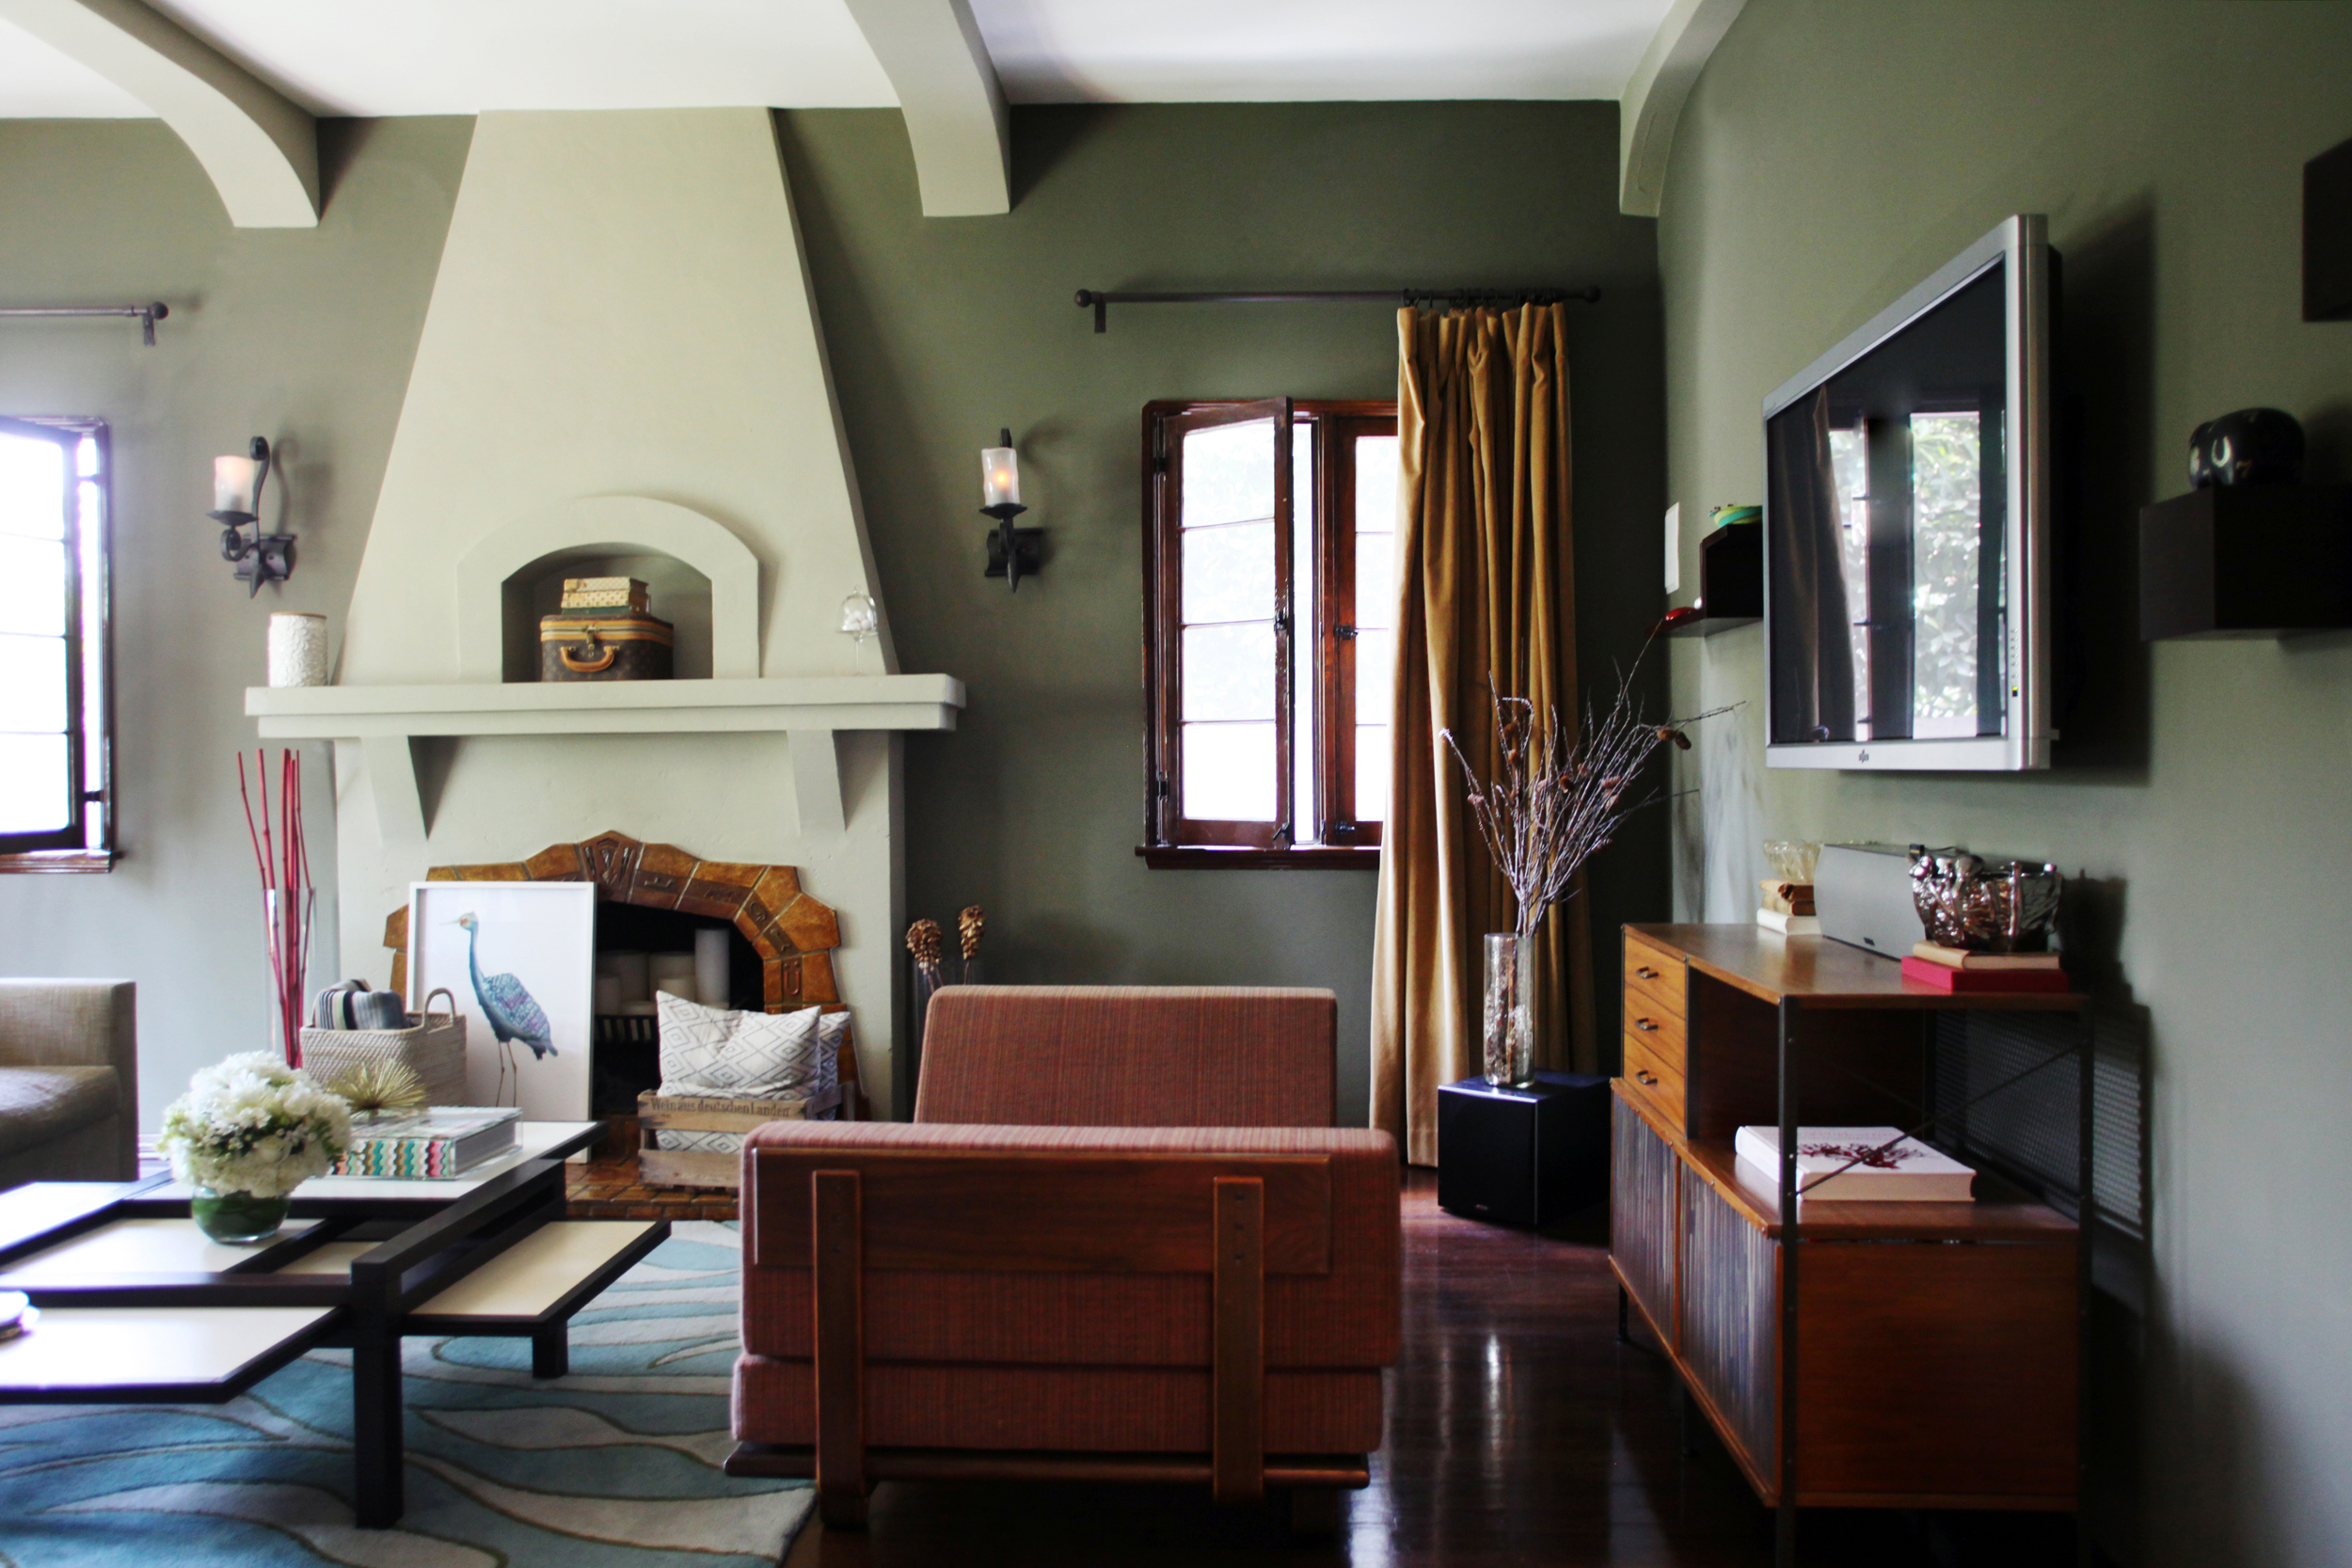
Tudor architecture is known for its exposed ceiling beams. Adding a little plaster and paint is a great way to update and add depth to a room.
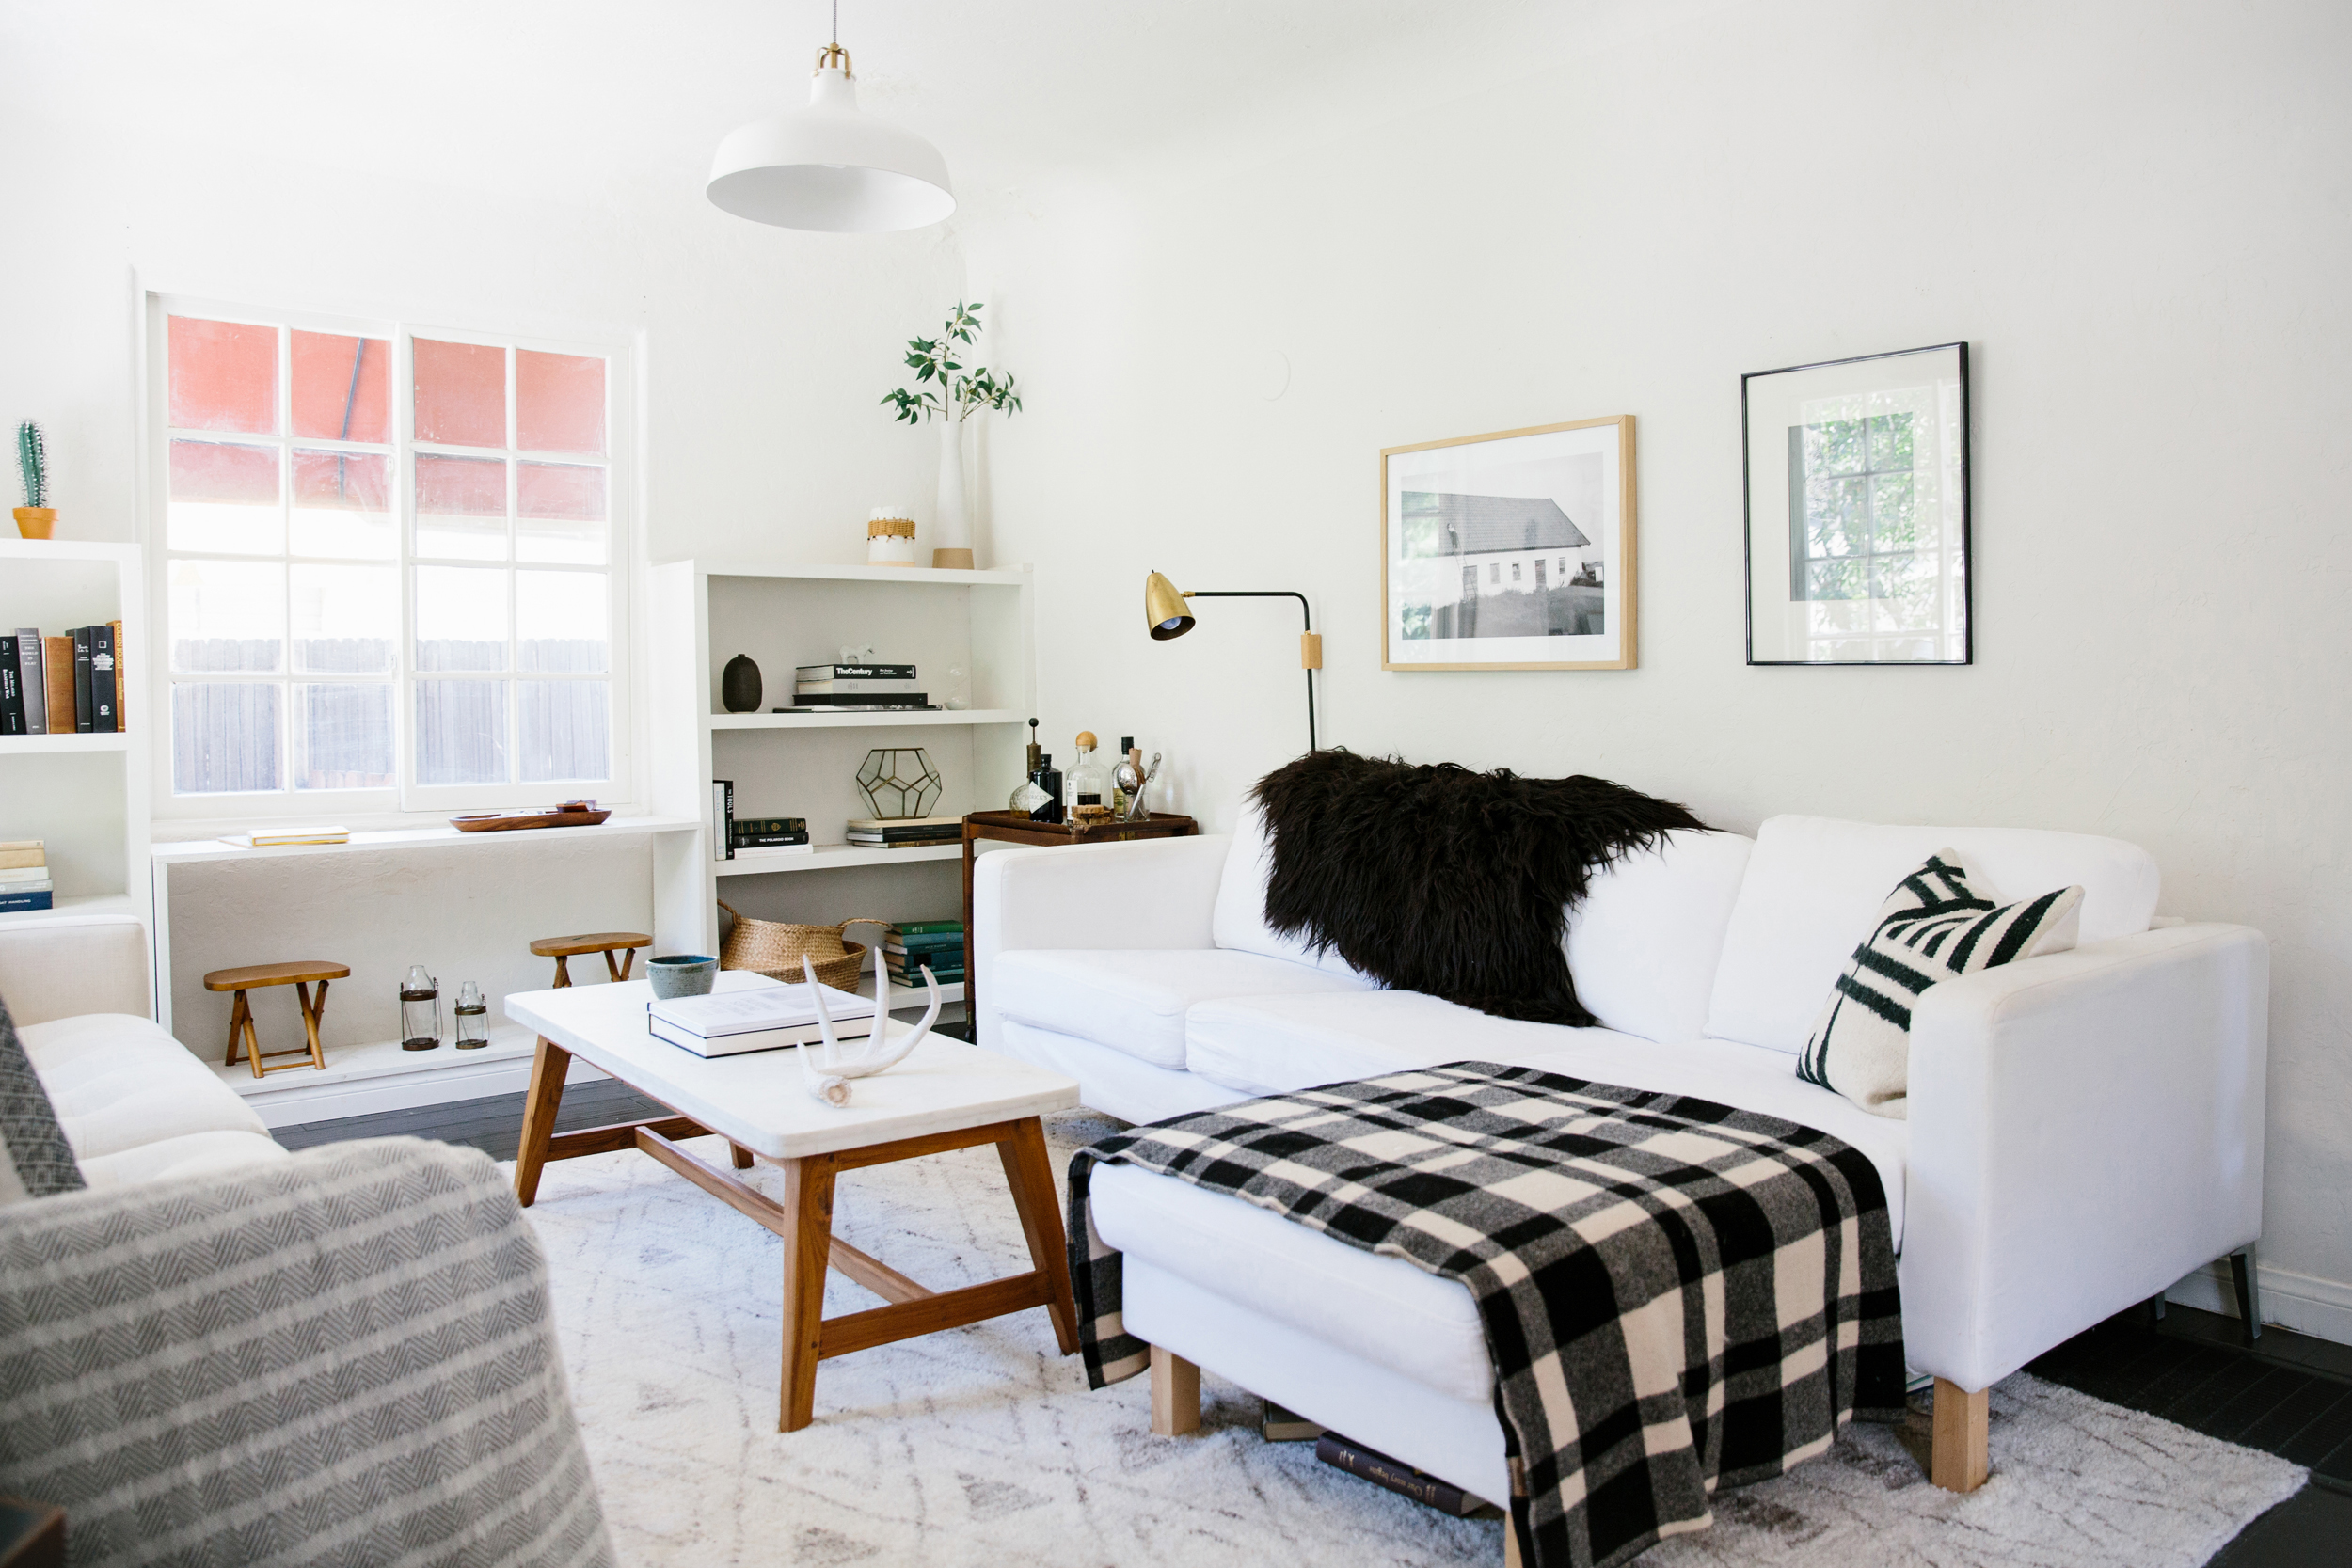
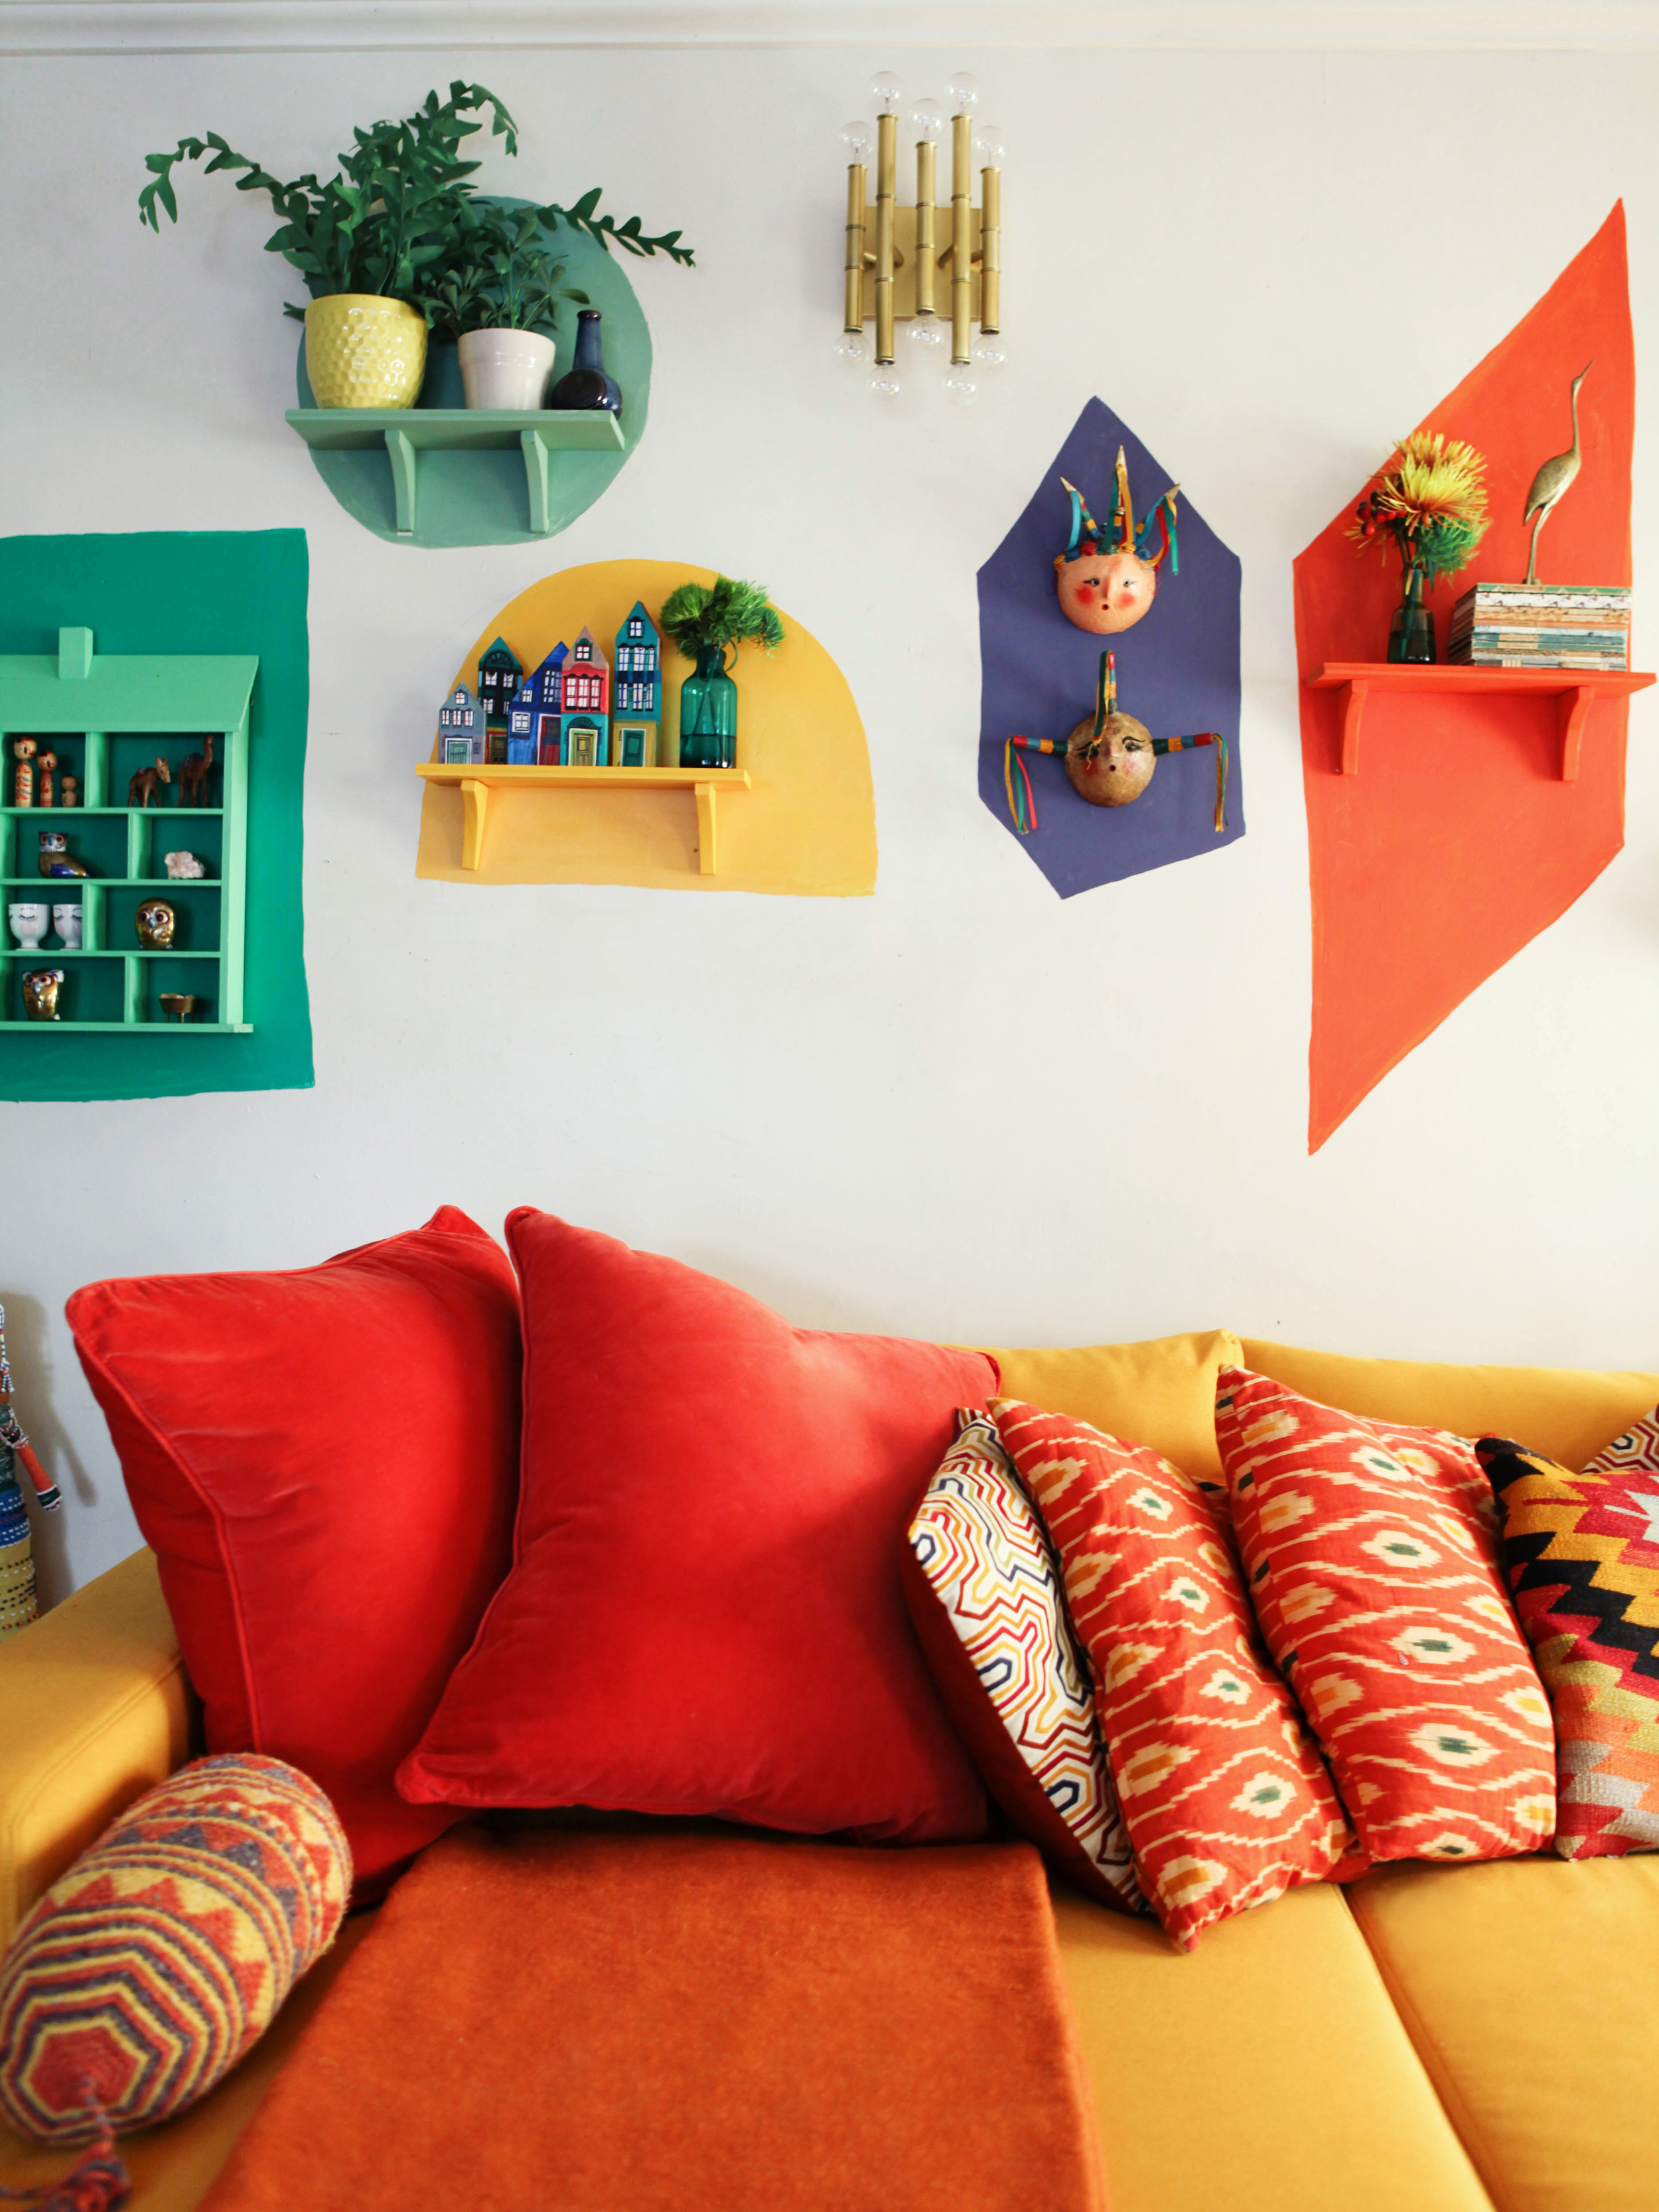
From simple color-blocking to handmade throw pillows, a little DIY can not only brighten a room, it can transport you to a different place entirely.
Aside from being the only man at my friend’s baby shower, my favorite thing was the heavenly cake she baked.
You might not expect a potter to ride a motorcycle, but that’s just one of the assumptions Felicia Burke defies.